
Reflections on Summer of Sustainability 2025
Earthville Institute’s Second Summer-long Program
and Our Fourth Annual Natural Building Workshops
October 31, 2025
Building on the new tradition established with last year’s Summer of Sustainability, once again this year we provided backstage passes to make the ongoing construction of our Colorado eco-campus available as a learning opportunity for anyone wishing to explore sustainable living and our relationship with nature.
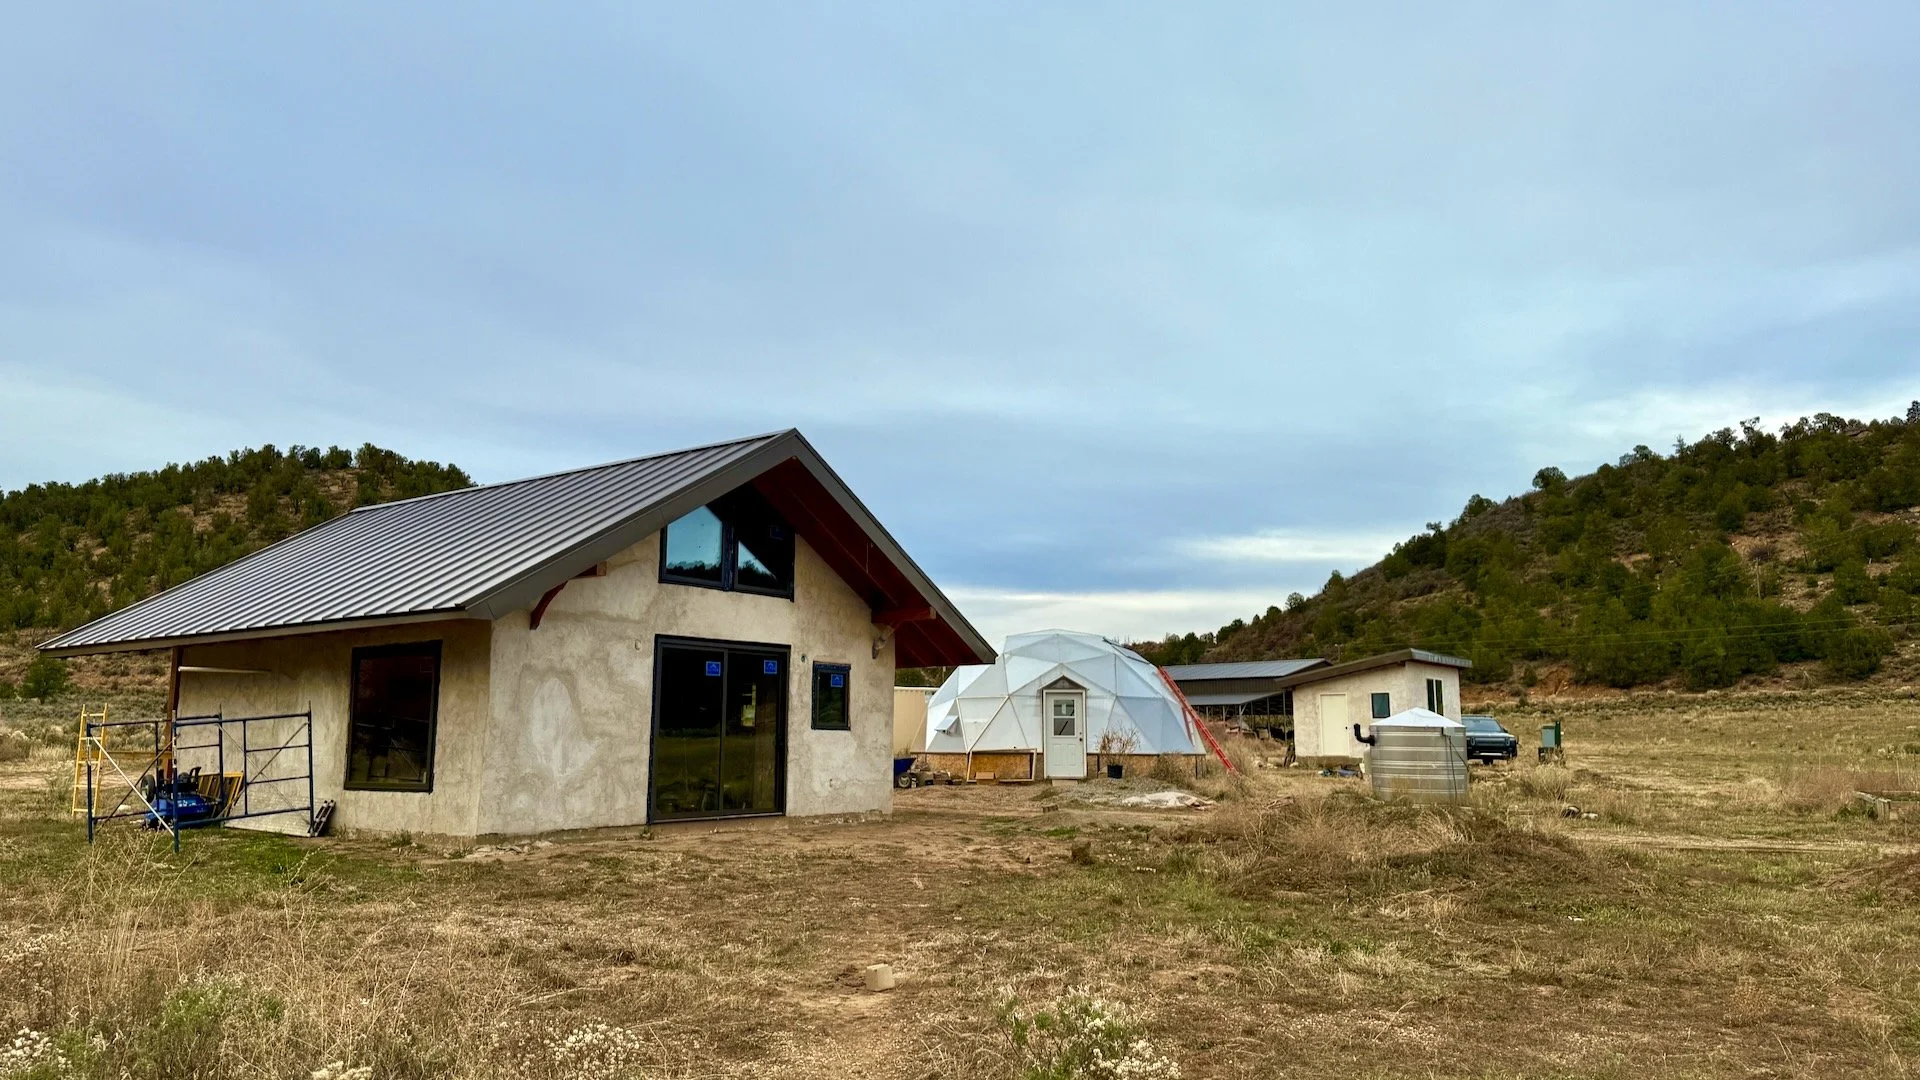
Earthville’s community kitchen building , geodesic dome greenhouse, and pump house as they stood at the end of last year’s building season
Starting point: The basic shells in place, waiting to be filled
When we left off with last season’s finale, the Earthville kitchen had gained its exterior skin (roof, windows, door, and second coat of exterior lime plaster) yet was still but an empty shell inside. Likewise, our geodesic dome greenhouse was also structurally complete, with its thermally regulating pond and solar-powered self-operating vents, but still waiting for its planter beds to bring it to life.
Those two food-related infrastructure priorities gave us a natural starting point for this season’s program.
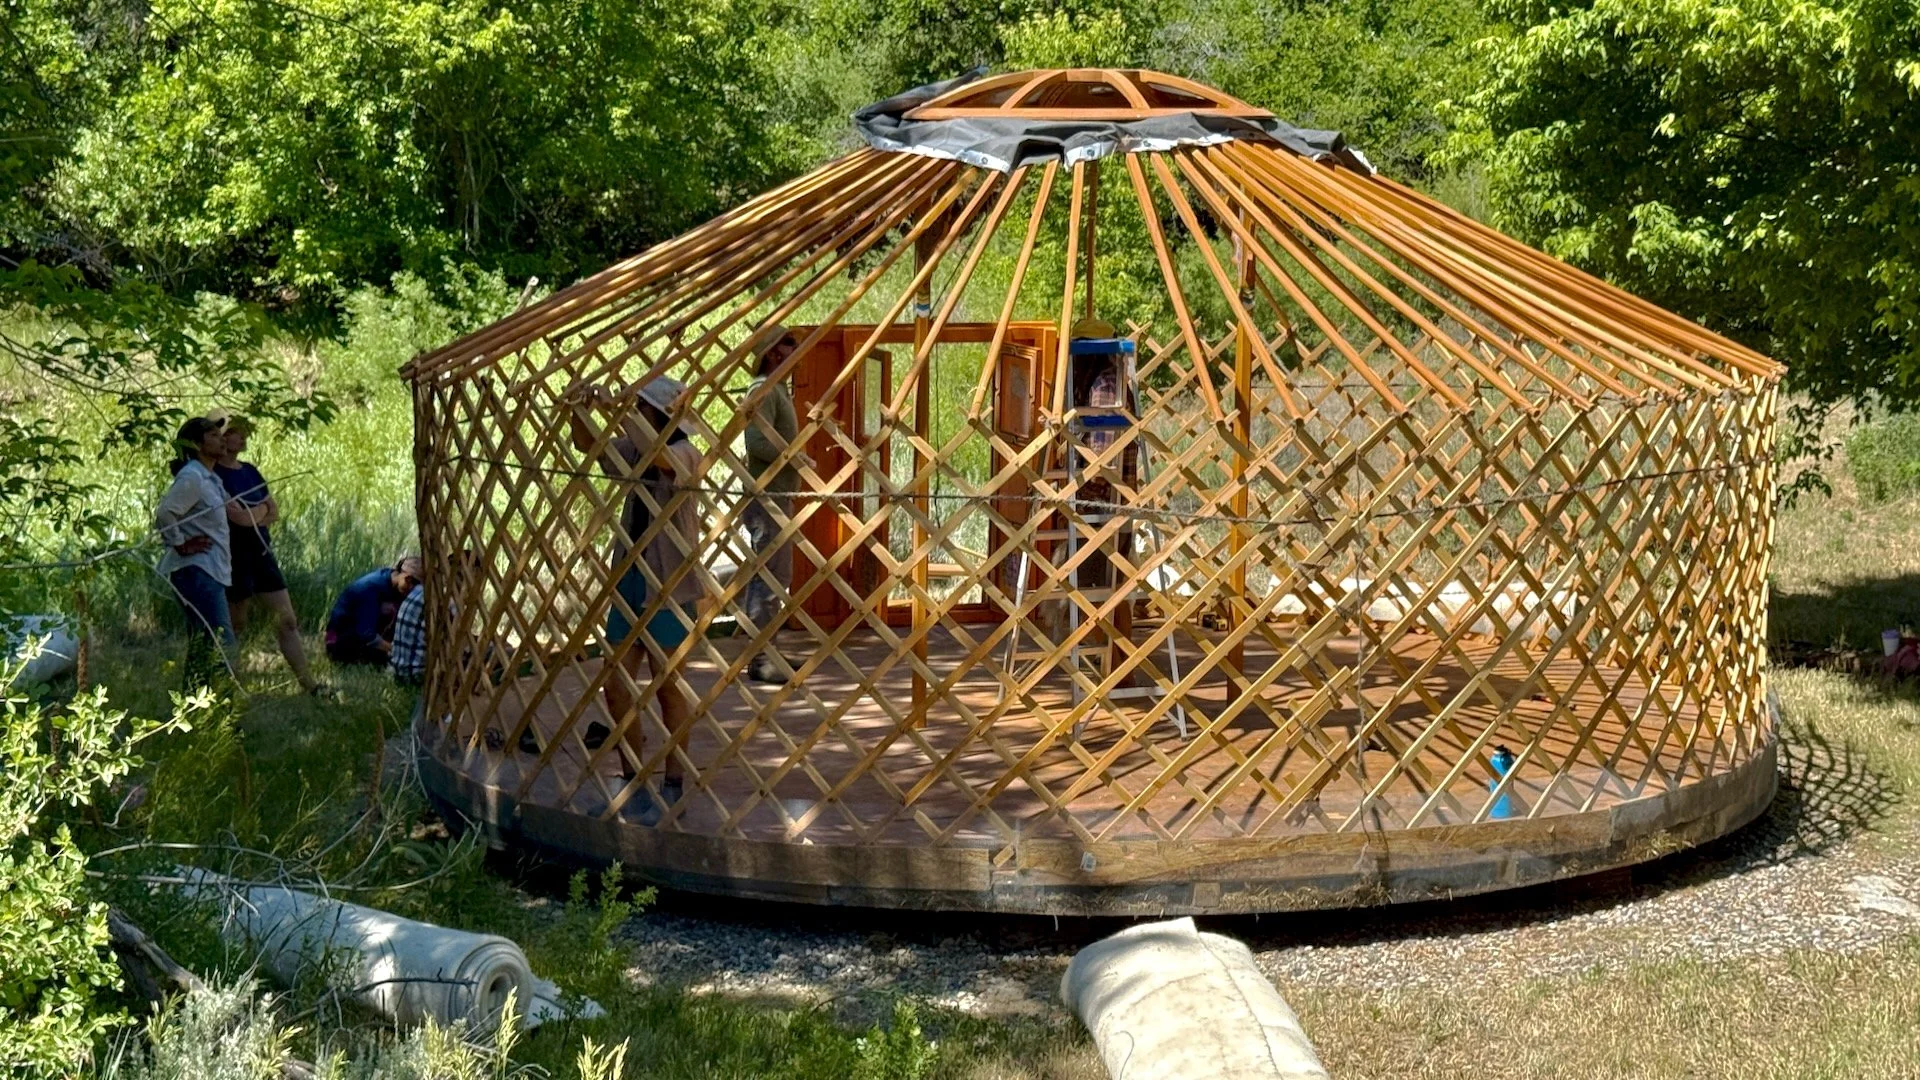
Starting from the center: Our beloved yurt reincarnates to host our 5-day meditation retreat.
Seeds for the season
As has become our tradition, we set the tone for the season with some contemplative practice to help us settle in.
We started by setting up Tingmo, our beloved Mongolian ger (yurt) for our five-day meditation retreat exploring practices to support us to work and create from a restful and centered place, as a way of integrating what we call “inner and outer sustainability.” Tibetan yoga practices give us a powerful way to connect with the warm presence that we aspire to bring into our work.
We then took the good vibes outdoors to find beautiful stones from around the site with which we’d build the first exterior raised beds around the perimeter of our geodesic dome greenhouse.
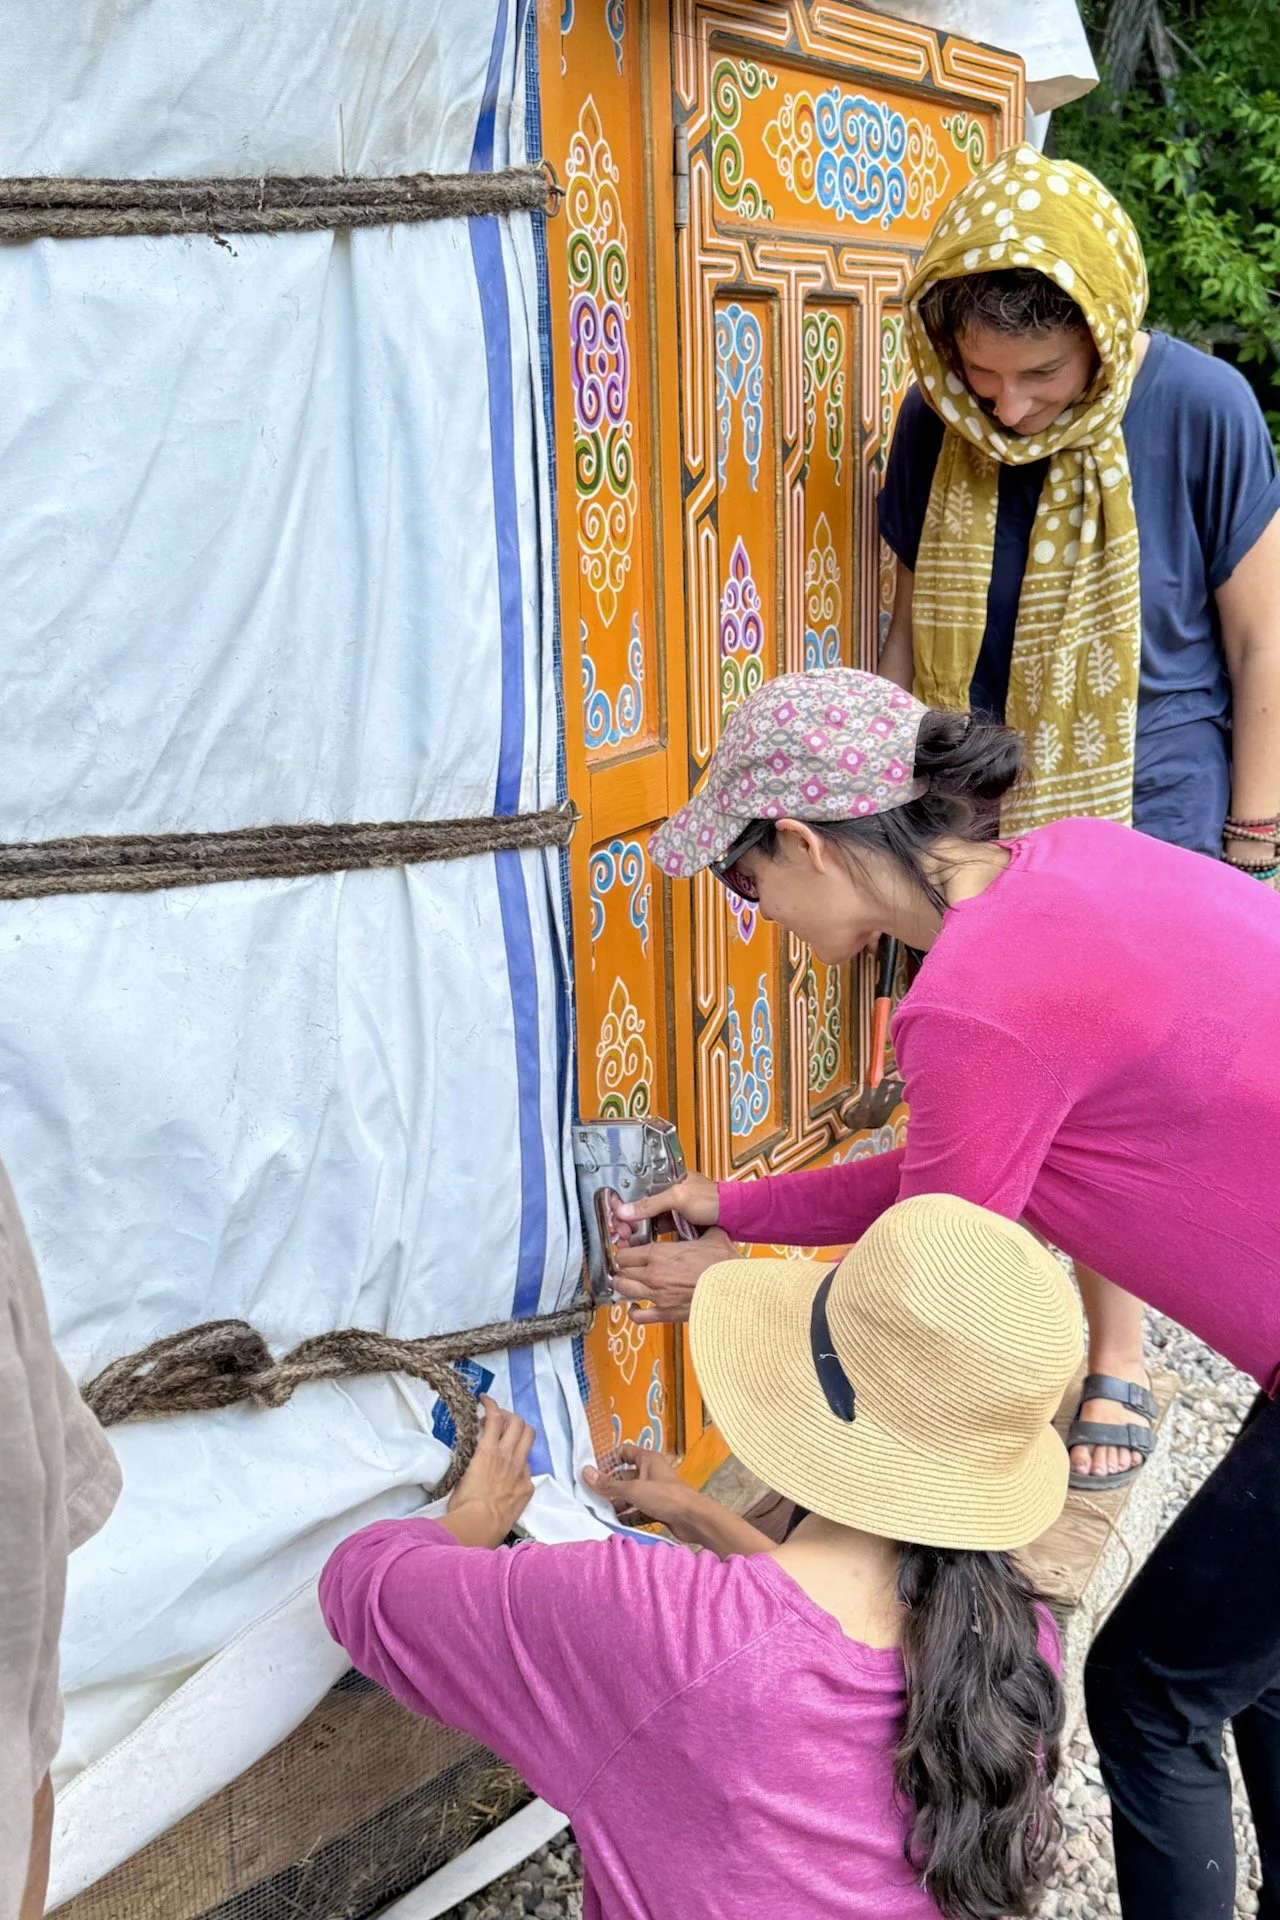
Buttoning up the yurt with care (we don’t mean to be inhospitable, but we kindly ask the mice to meditate outside, please).
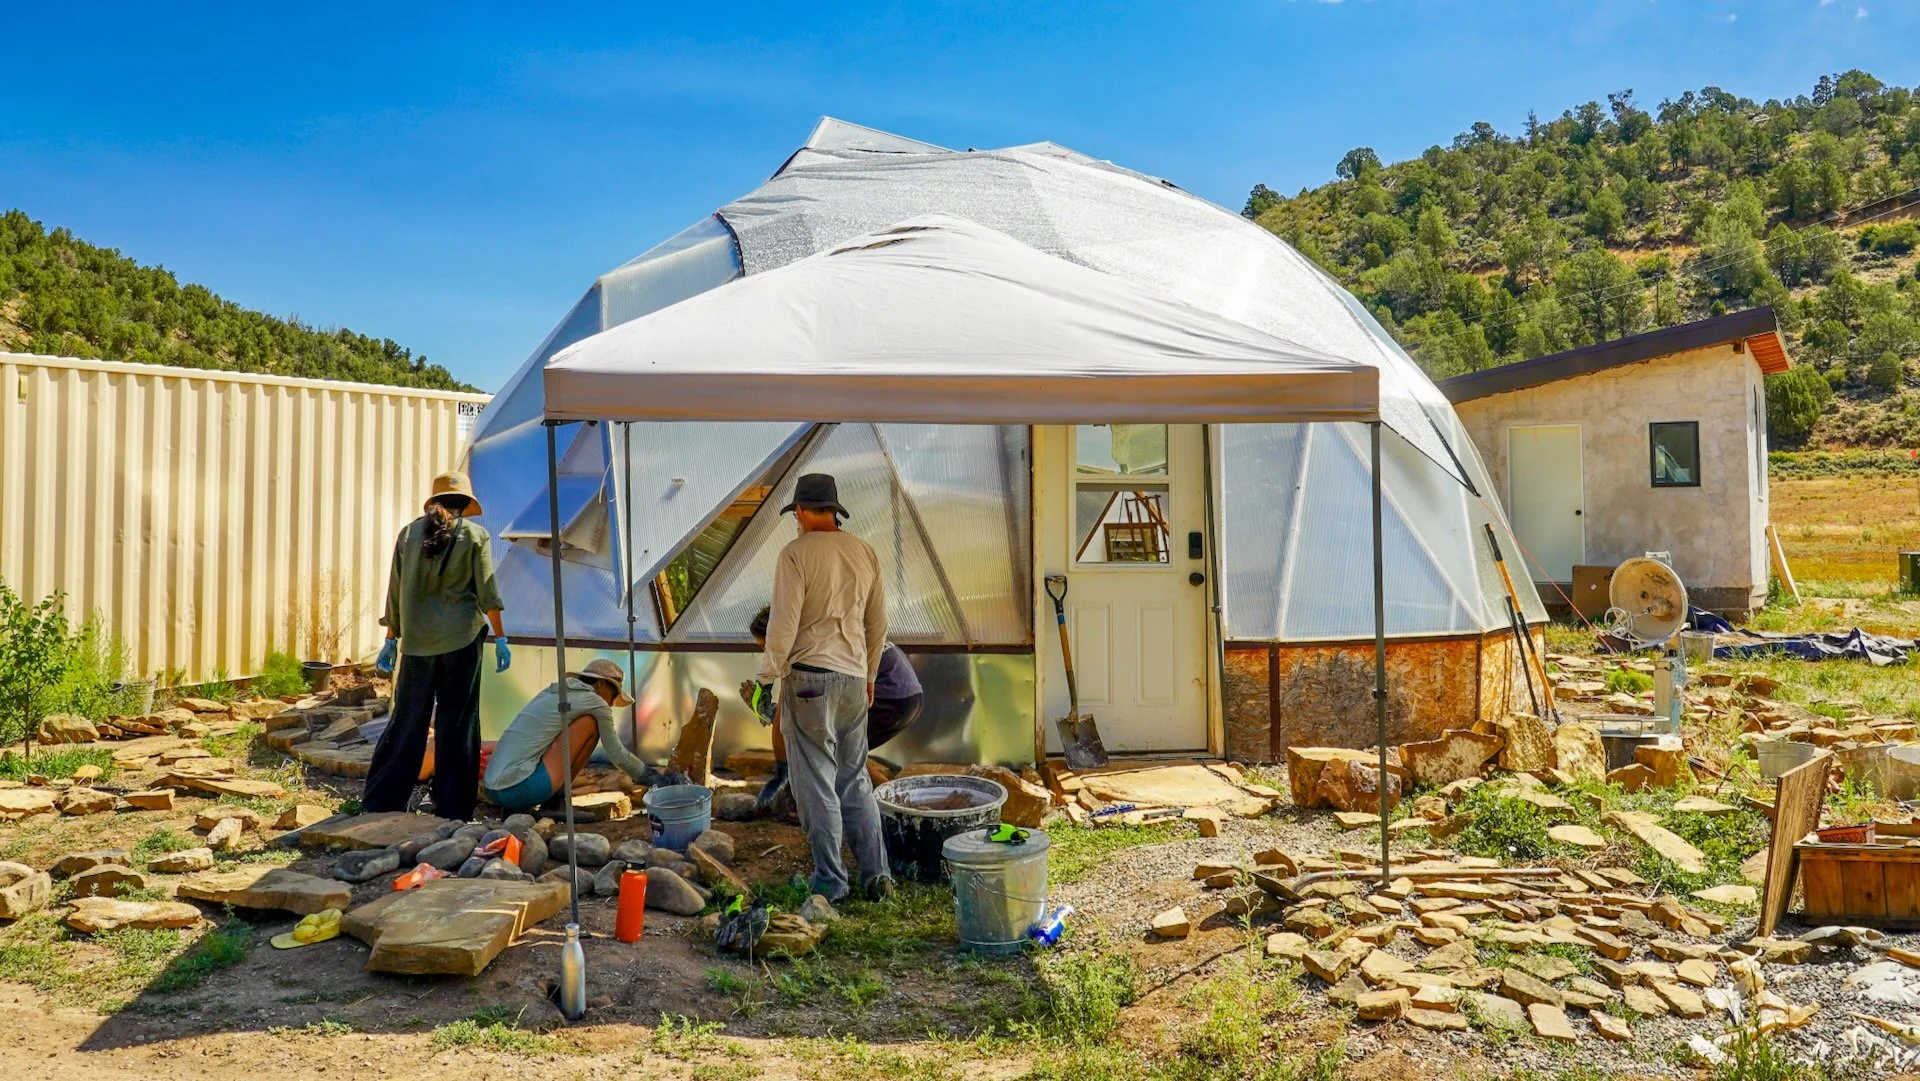
Ready to rock: Setting the stage to create our stone raised-bed planters around the greenhouse dome
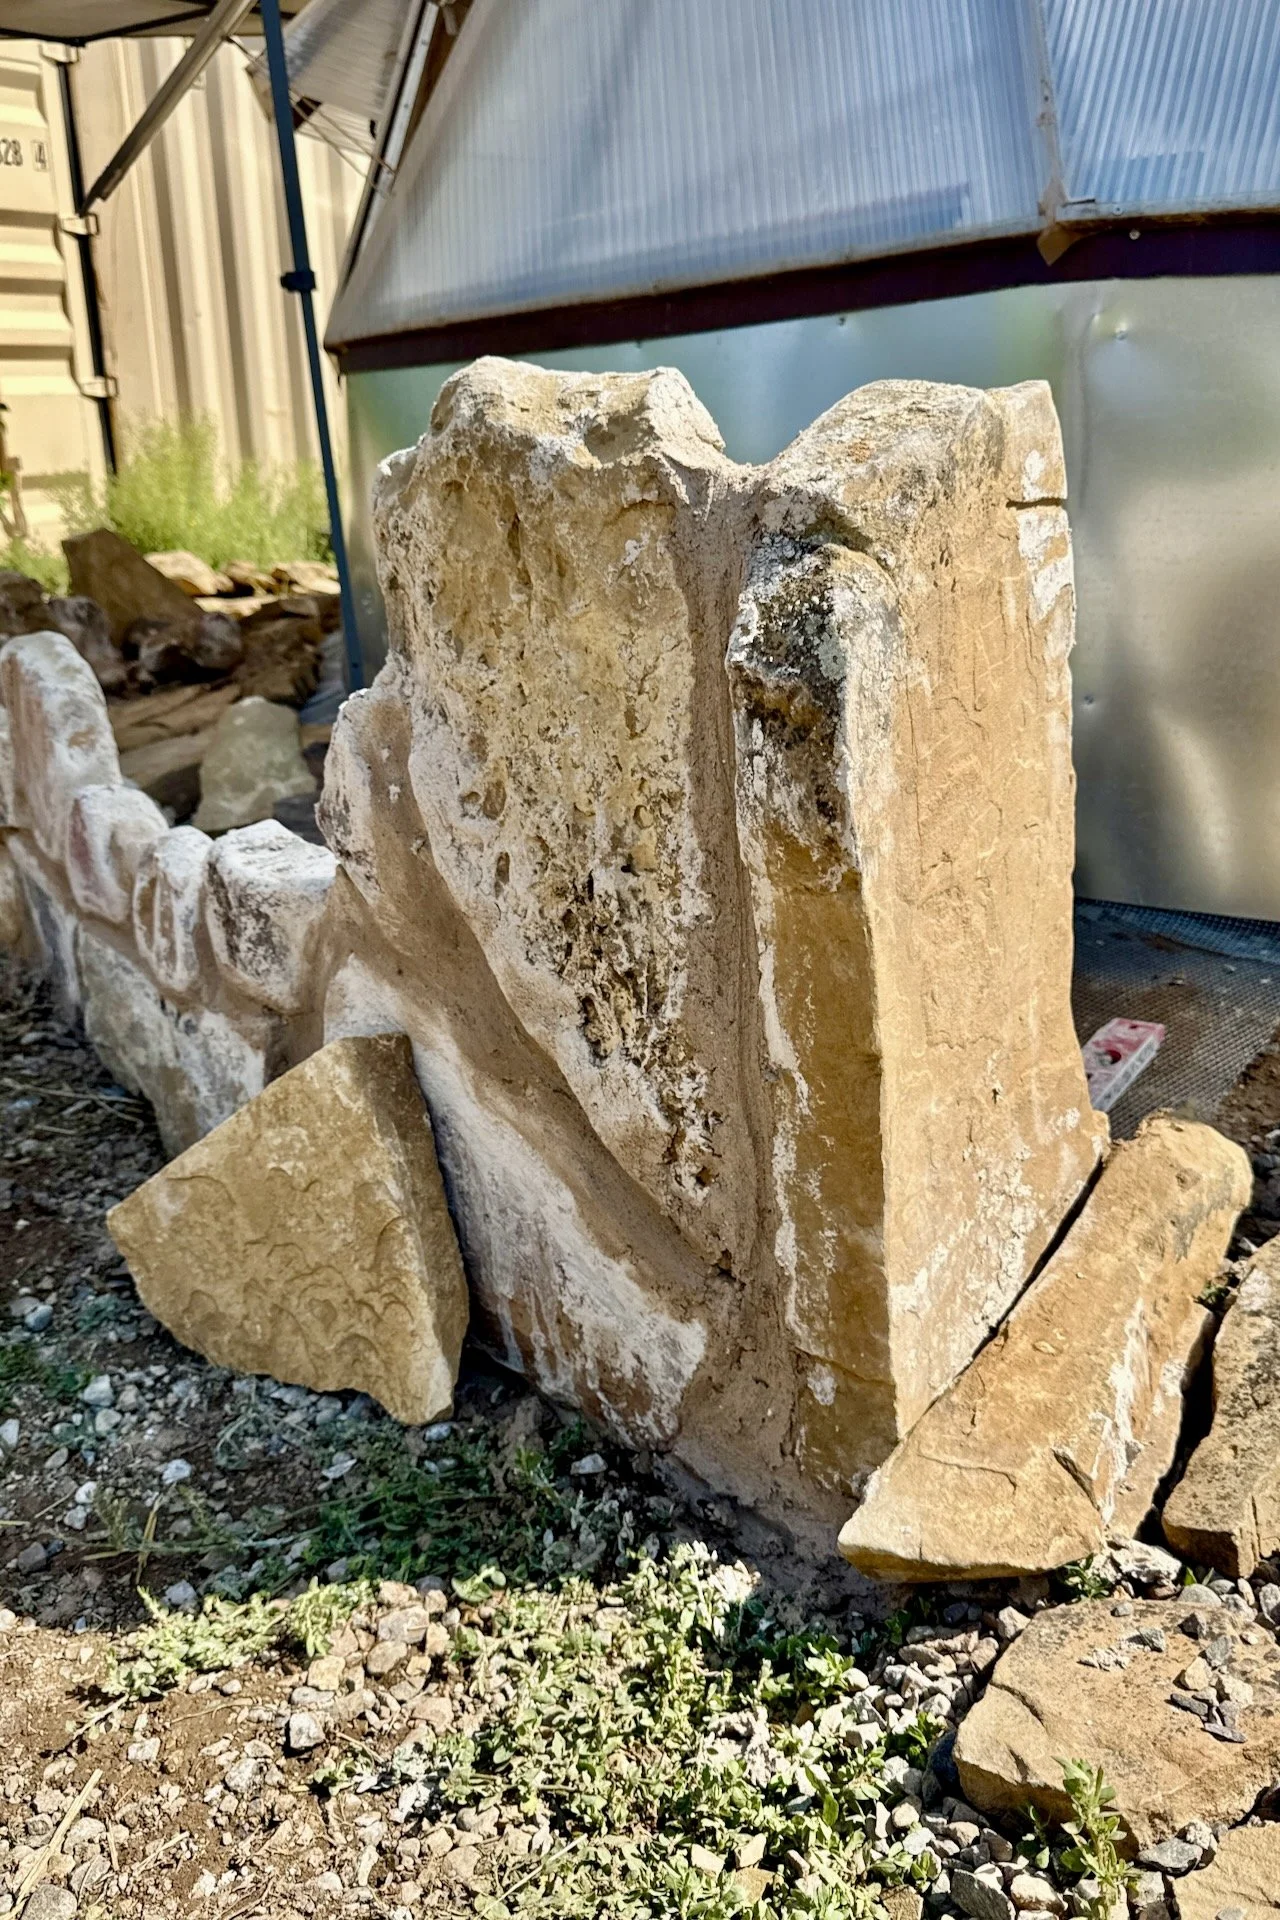
A lucky perfect fit
Organic Tetris
Stone masonry, a traditional natural building technique that goes back centuries in our region (long before settlers of European ancestry arrived), can be a very engaging meditation, scanning a collection of rocks to find that perfect one to fit the next spot you need to fill.
One that stone is found, it is set in place with a mortar. In this case, we made our mortar by mixing air lime and bit of soil from our site with water.
There’s a learning curve but, once you dive in, solving the puzzle is a genuine joy, and then it can be hard to stop once you’re on a roll.
Our new trainees took to it admirably, and created a beautiful collage of patterns, textures and colors.
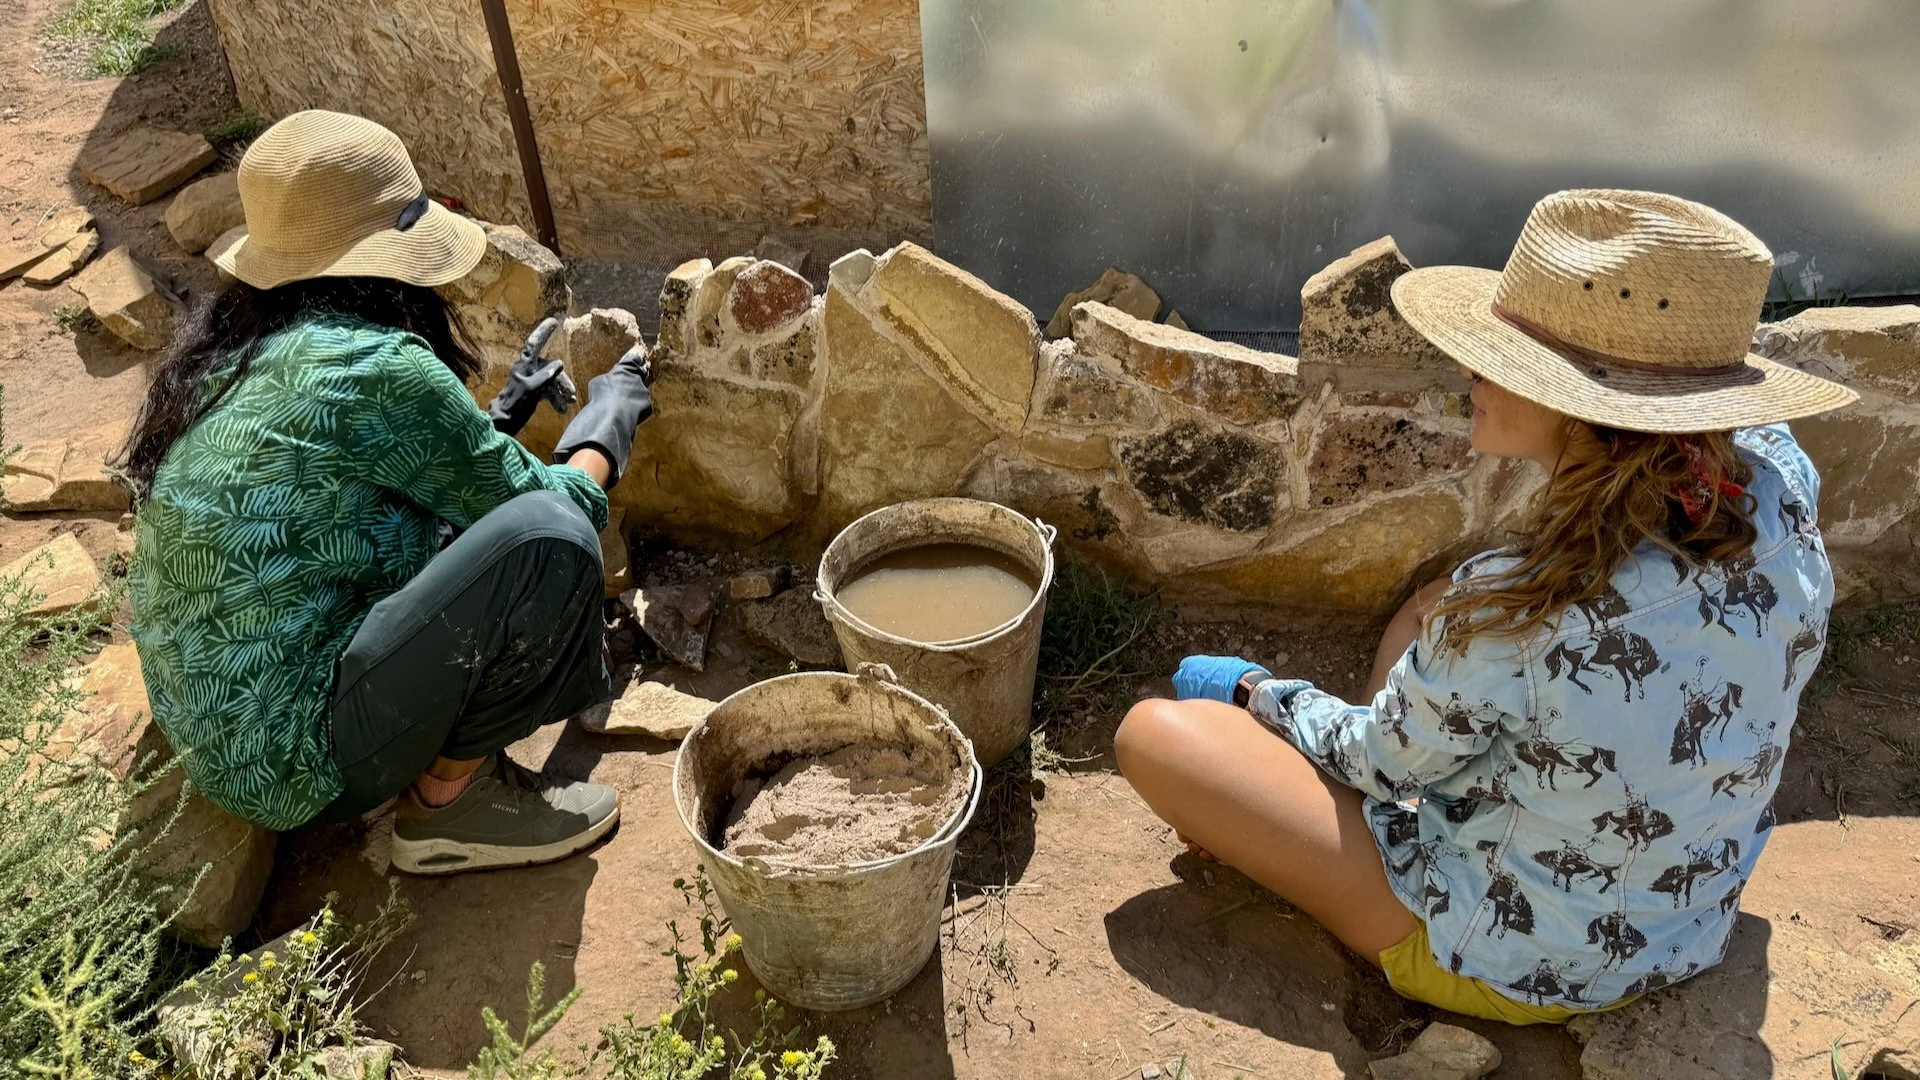
Anusha and Leslie taking it to the next level
Let’s get some soil in there!
When the stone work reaches the desired height for the raised beds, we’re ready to build a healthy soil.
We start by adding quite a bit of wood to the bottom of the bed. This helps with drainage and aeration. And, for extra credit, we collected most of the wood from the riparian zone where the creek runs through the campus, and the damp climate fosters the growth of beneficial fungi on the wood. These fungi will be a big boost to the soil in these beds by supporting mycelial networks that help to nourish the roots of the plants.
After adding the wood, we then build a soil on top of it, using a mixture of our native soil and lots of mature compost from our pile.
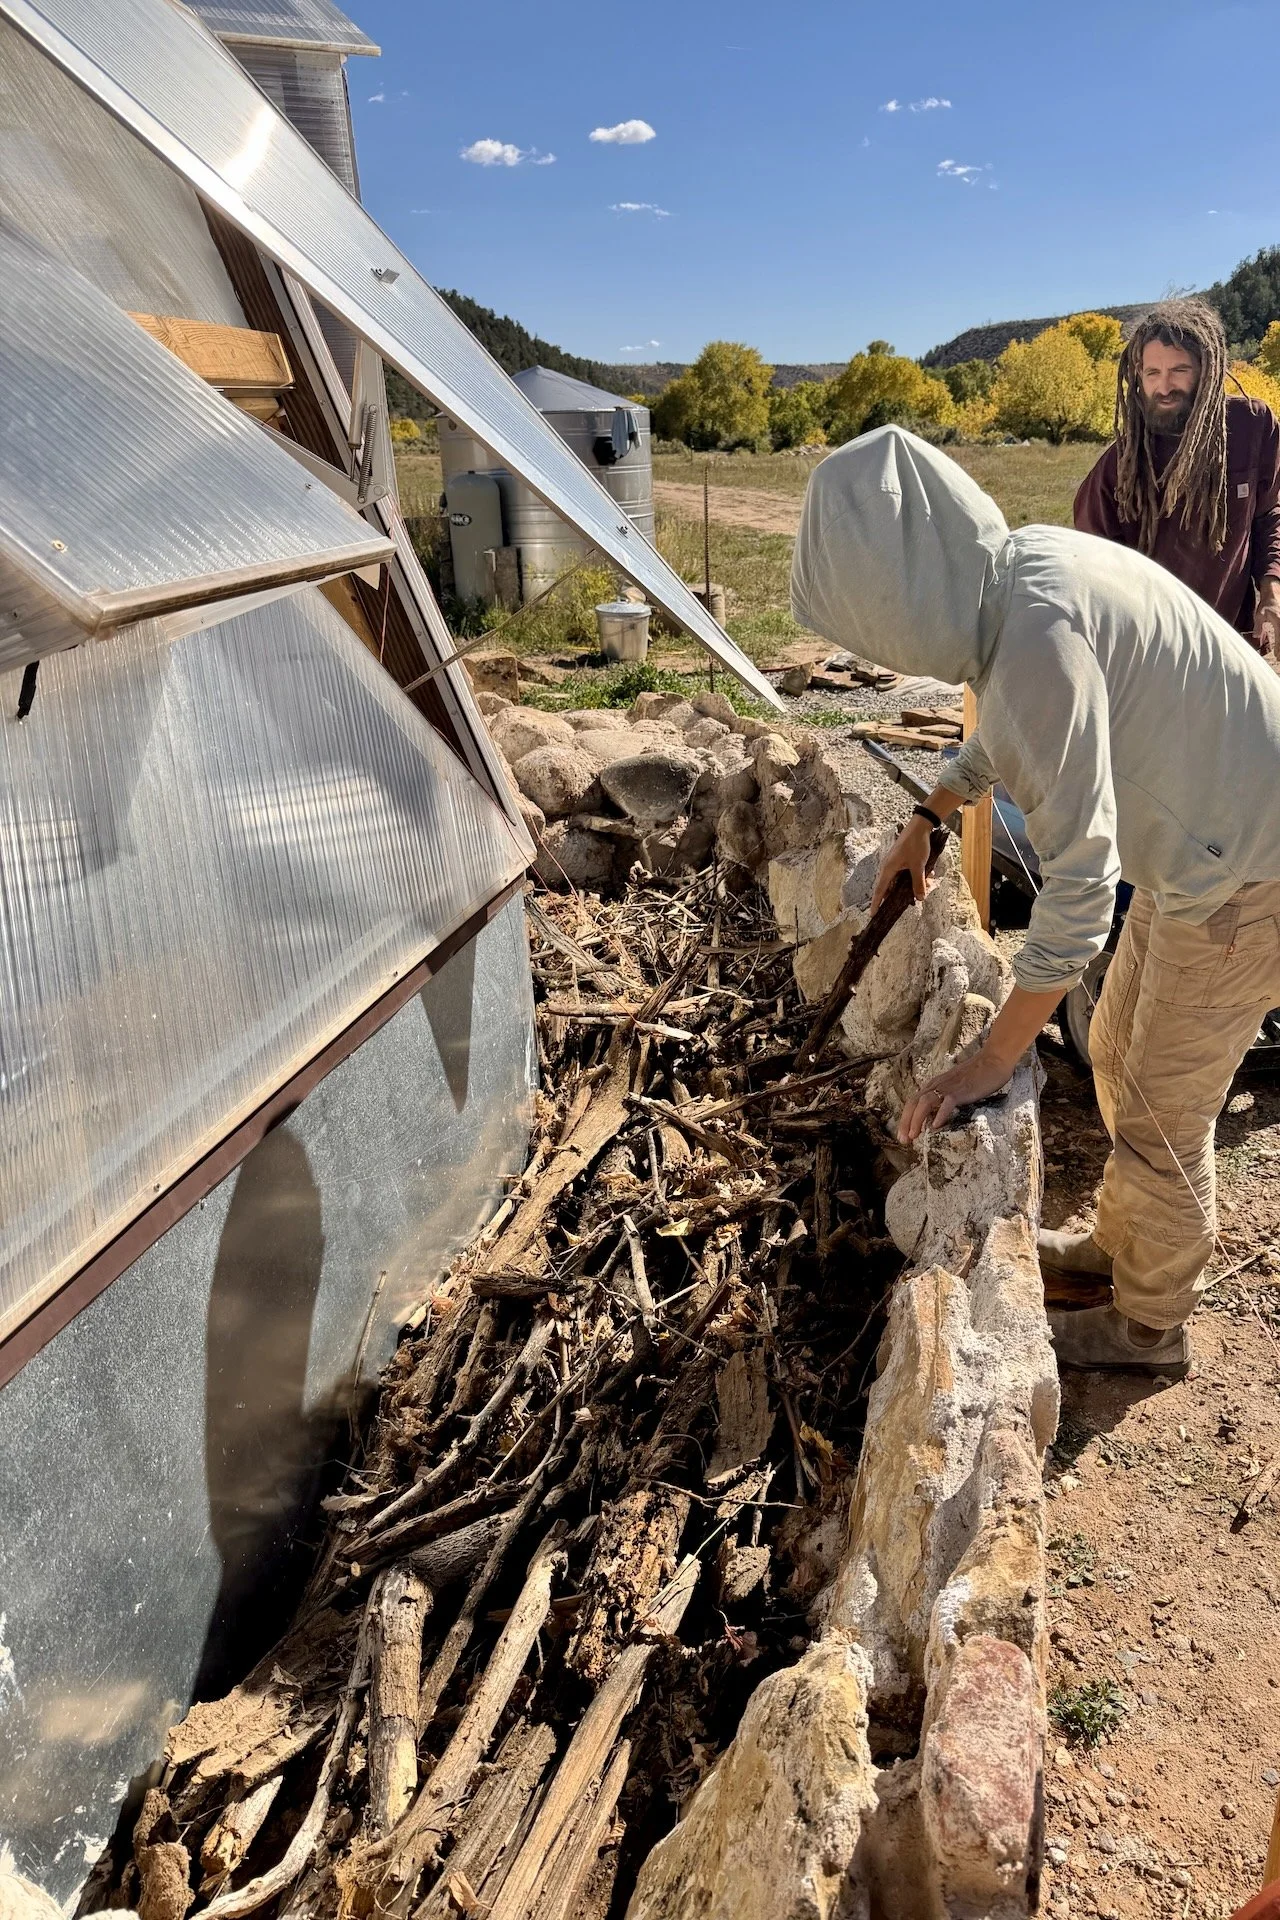
Adding wood to the base of the raised bed
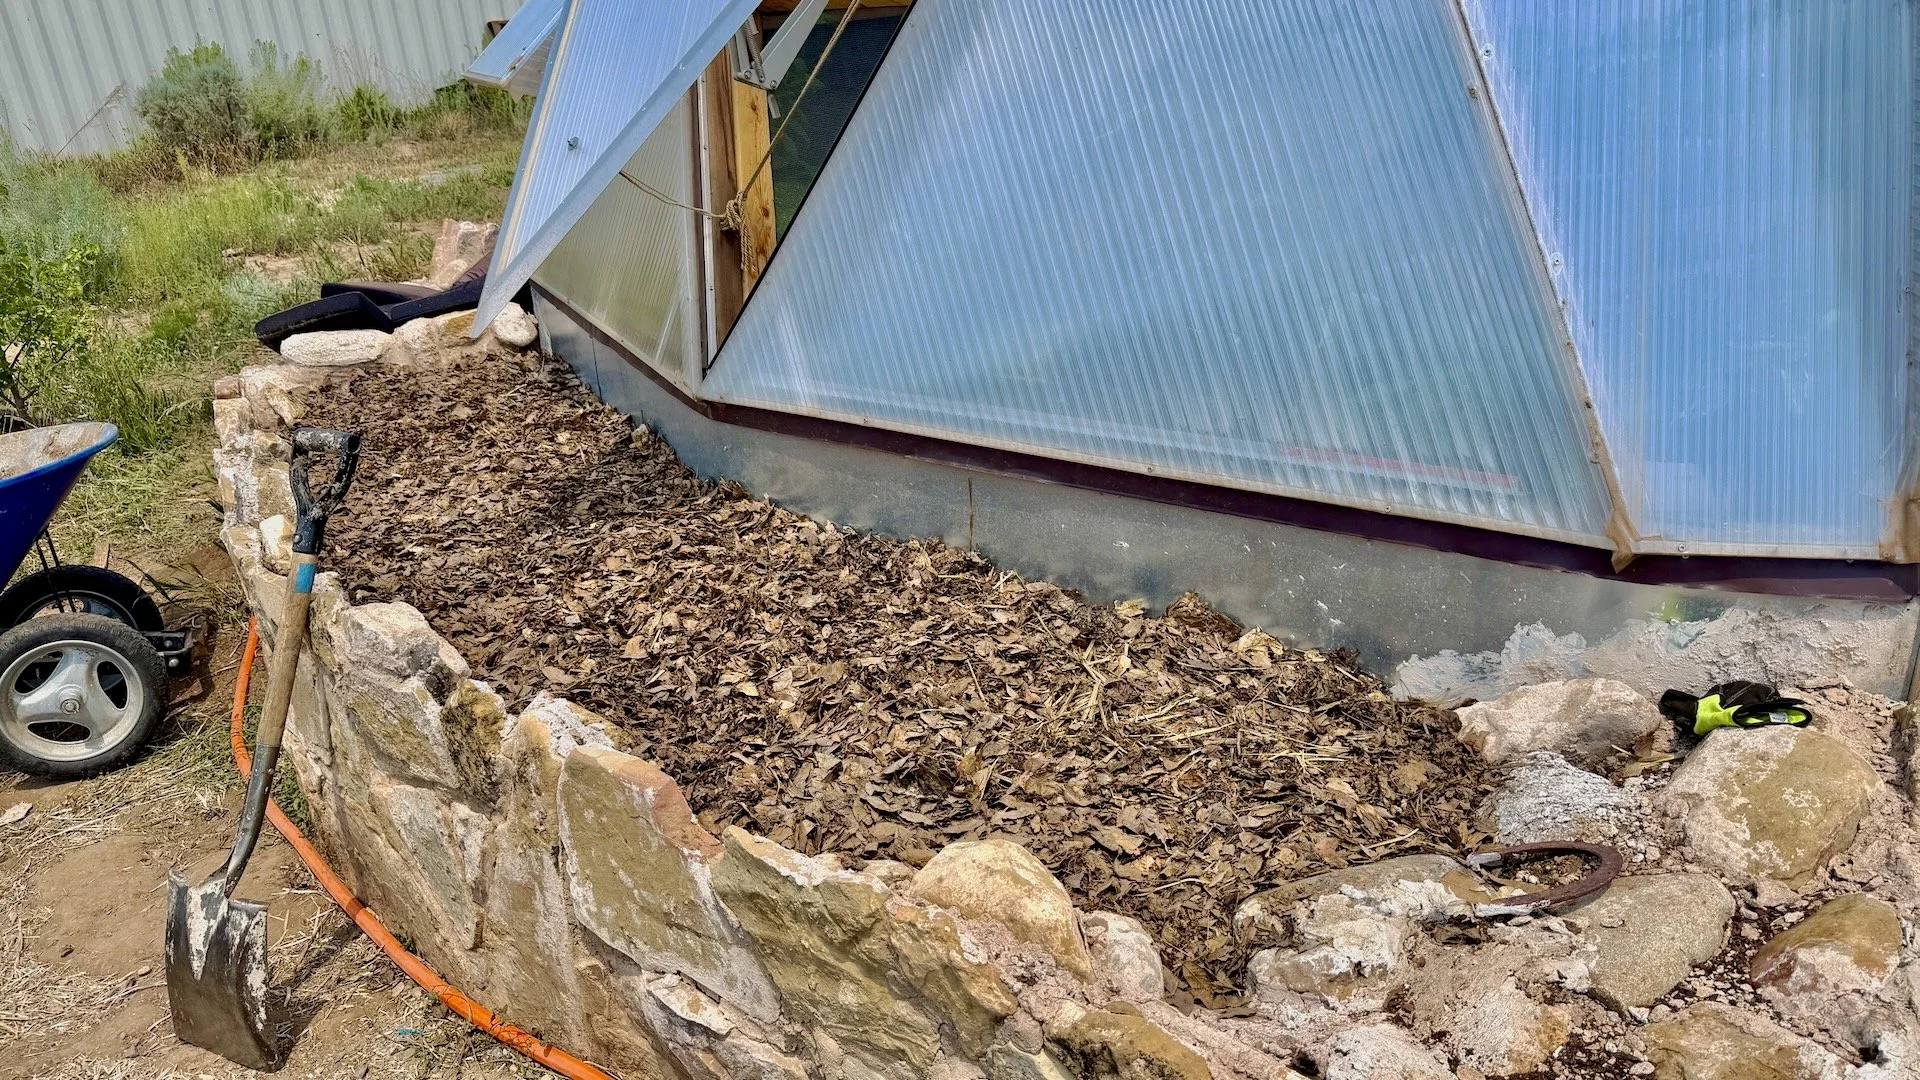
Ready for dinner: stone planter bed filled with healthy soil and awaiting seeds
Touching Earth: Our fourth annual natural building workshop
Lime with a twist: Limecrete, meet radiant heat
Natural hydraulic lime (NHL) is made from limestone, ground into powder and heated in a kiln. It’s a fantastic natural building material, used throughout much of the world for centuries, including the Pantheon and all the great buildings and aqueducts of ancient Rome, which have survived for nearly two millennia (a claim few structures of any kind can make).
Among the many uses of lime as a building material, one of the less common is limecrete flooring. It’s rare because it’s a specialized skill and not easy to pull off well, but the results can be so good — and the carbon footprint and embodied energy so low in comparison with most other types of modern flooring — that we felt it needed to be part of the solutions we showcase here at Earthville Institute.
And, in this case, we added an extra twist: The limecrete floor of Earthville’s kitchen will have hydronic radiant heating, which means in winter hot water (heated passively by the sun) will run through tubes set in the limecrete floor, heating the floor, and then (because heat rises) this will warm the entire building. And because the straw-bale walls of the building are so insulating, that’s all the heating that will be required to keep the kitchen cozy all winter.
The first step is laying a base layer of limecrete about two inches thick on top of the insulating perlite layer we had previously compressed underneath it and covered with burlap cloth made from jute fiber.
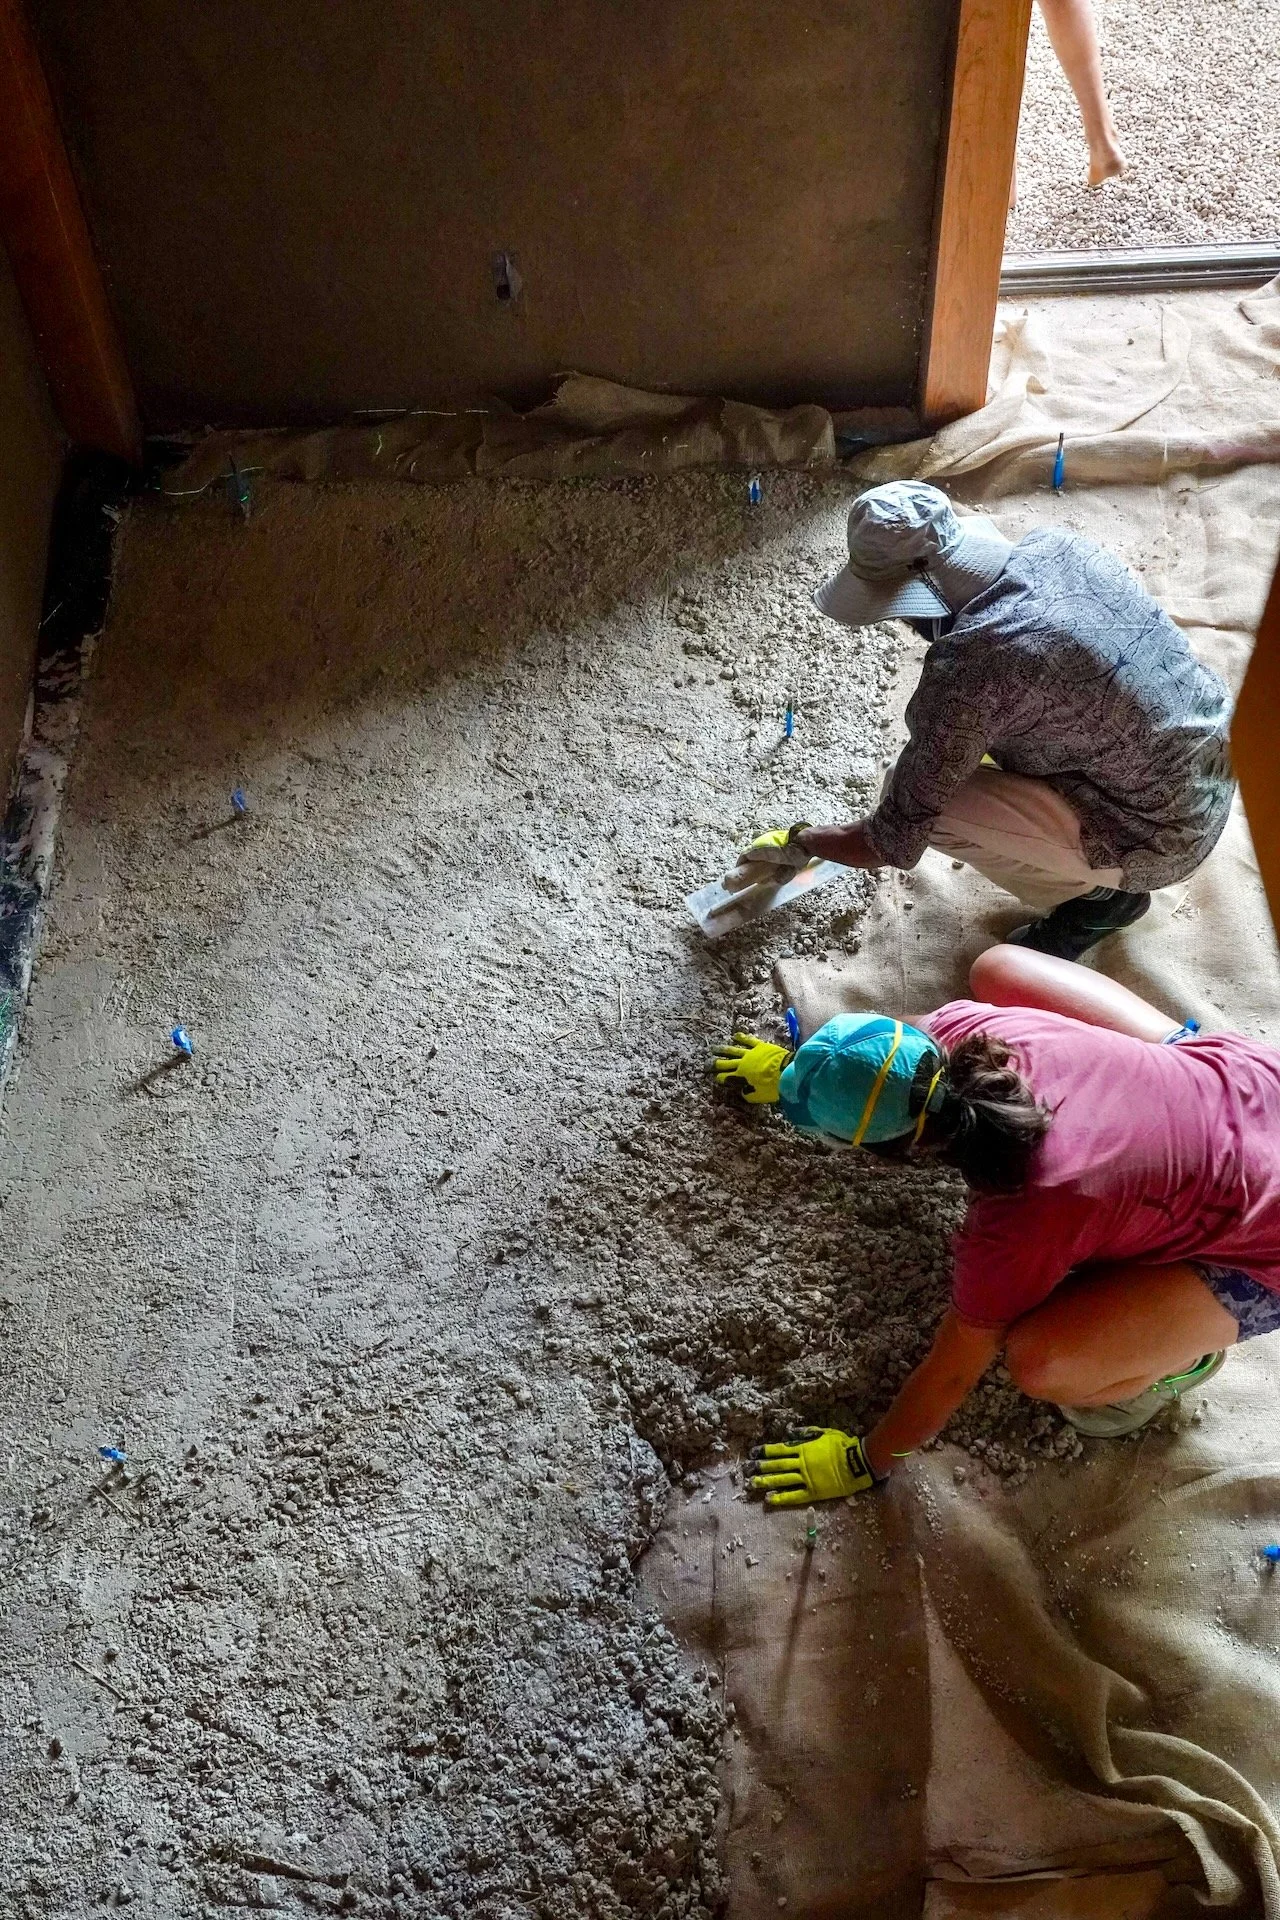
Risa and Dhruv laying the base for the limecrete floor
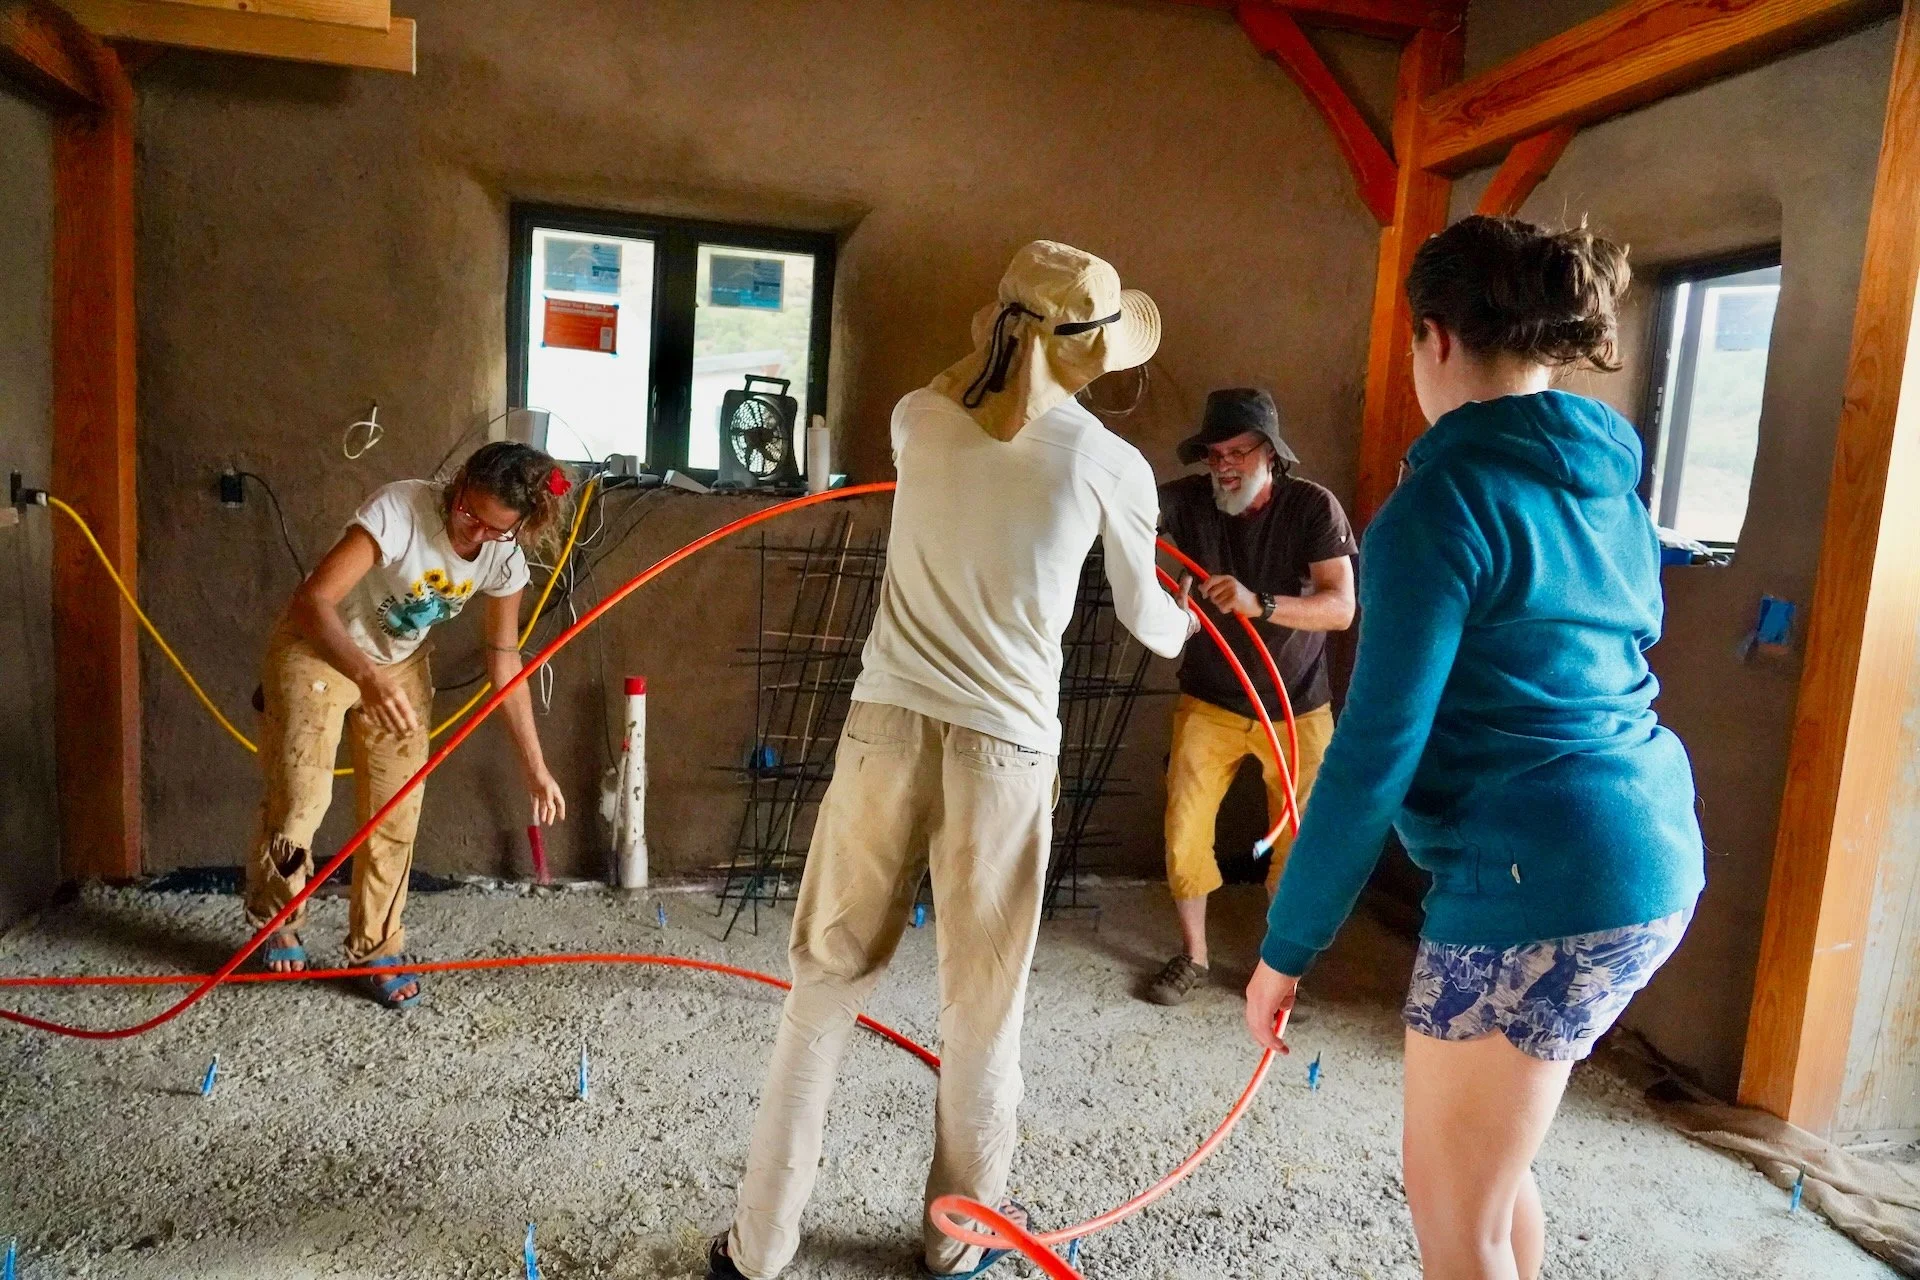
Coaxing the PEX tubing into the required patterns
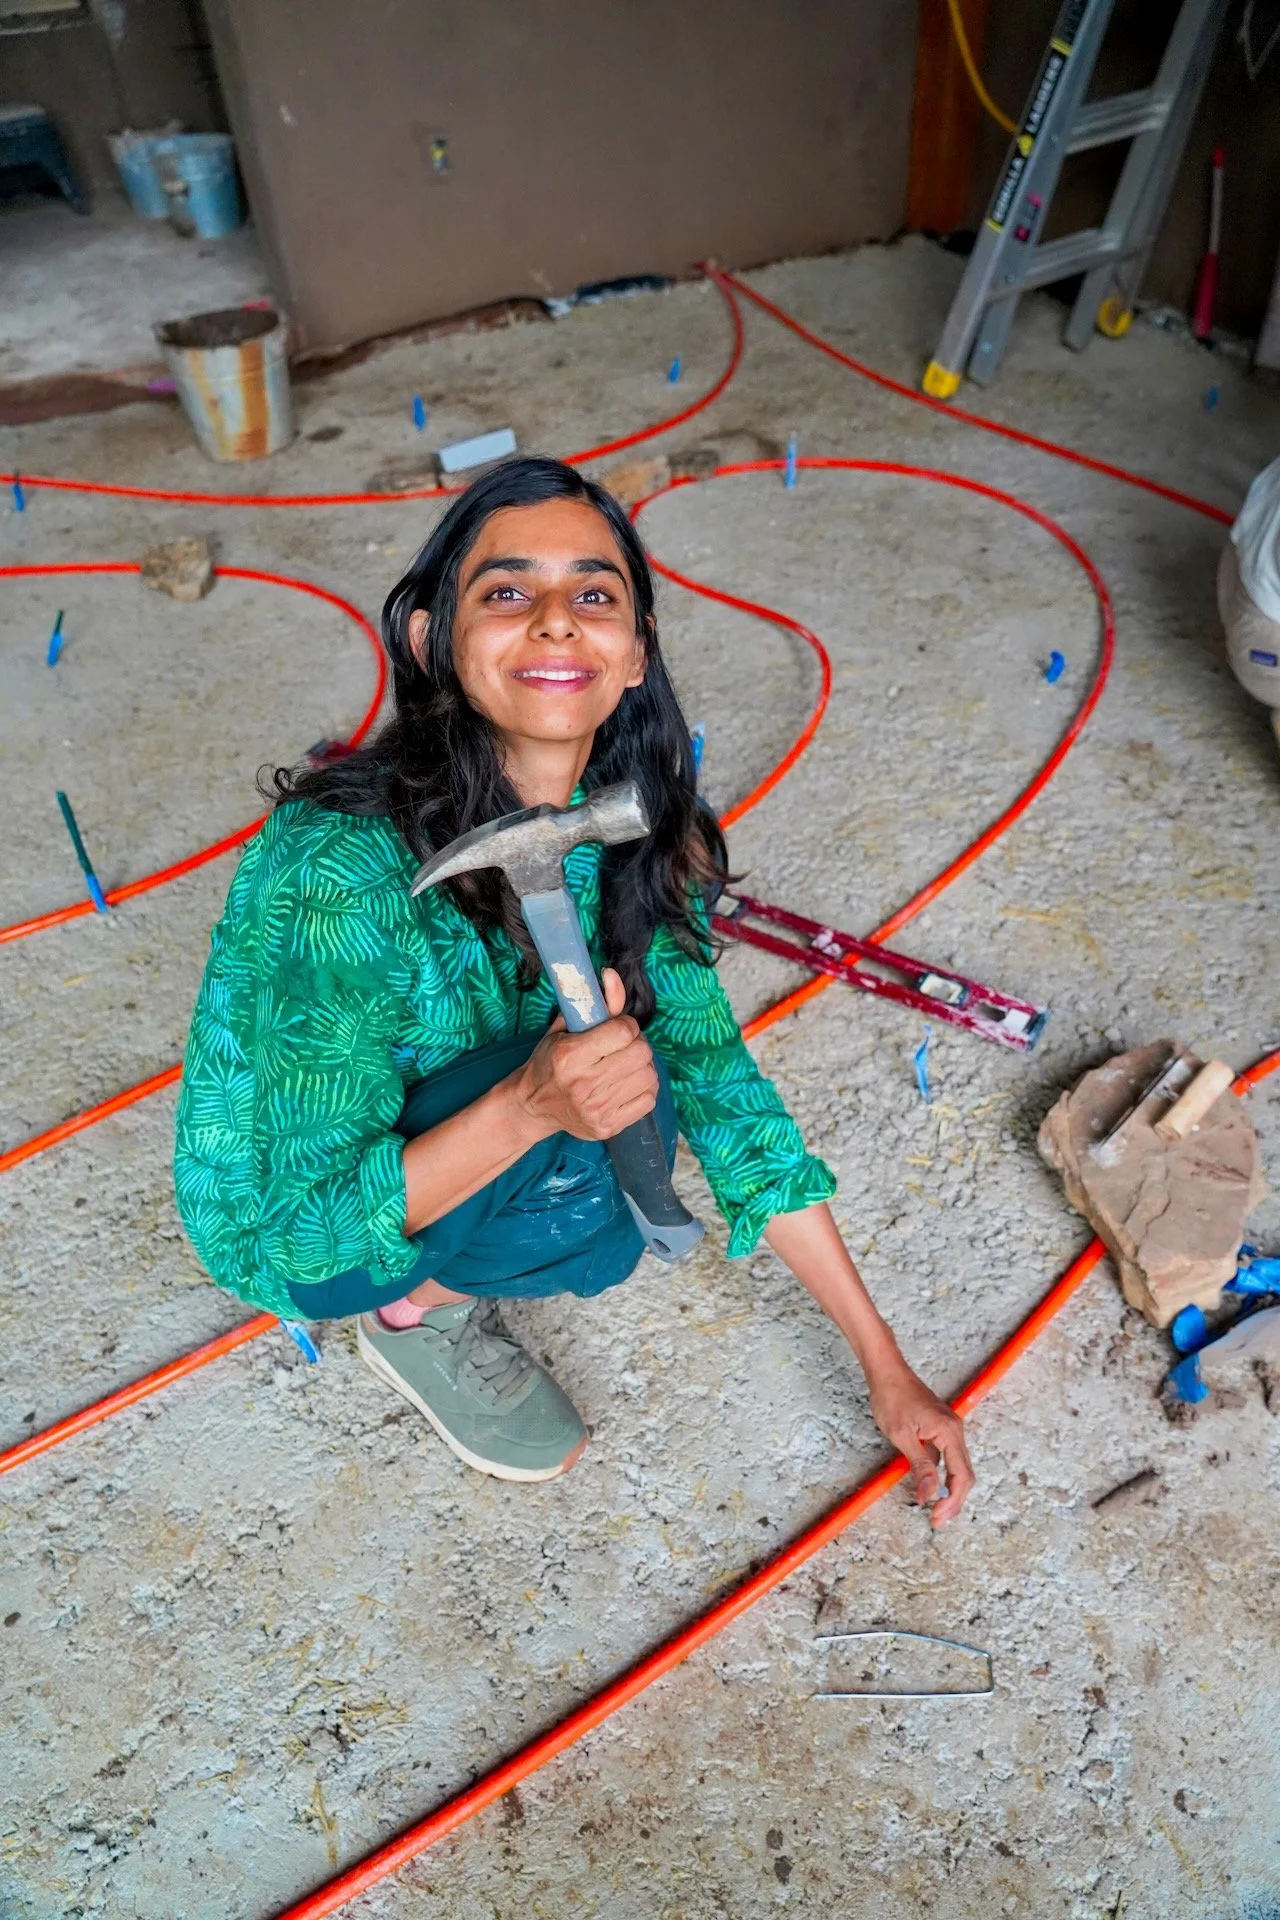
Anusha nails it
The Joy of PEX
The tubing required for hydronic radiant heating (called PEX) is a wily beast, and must be handled with care to avoid causing kinks that are difficult to undo.
Once we have it where we want it, we secure it to the base layer of the limecrete floor using landscaping staples.
When it’s all done, it looks a bit like a labyrinth.
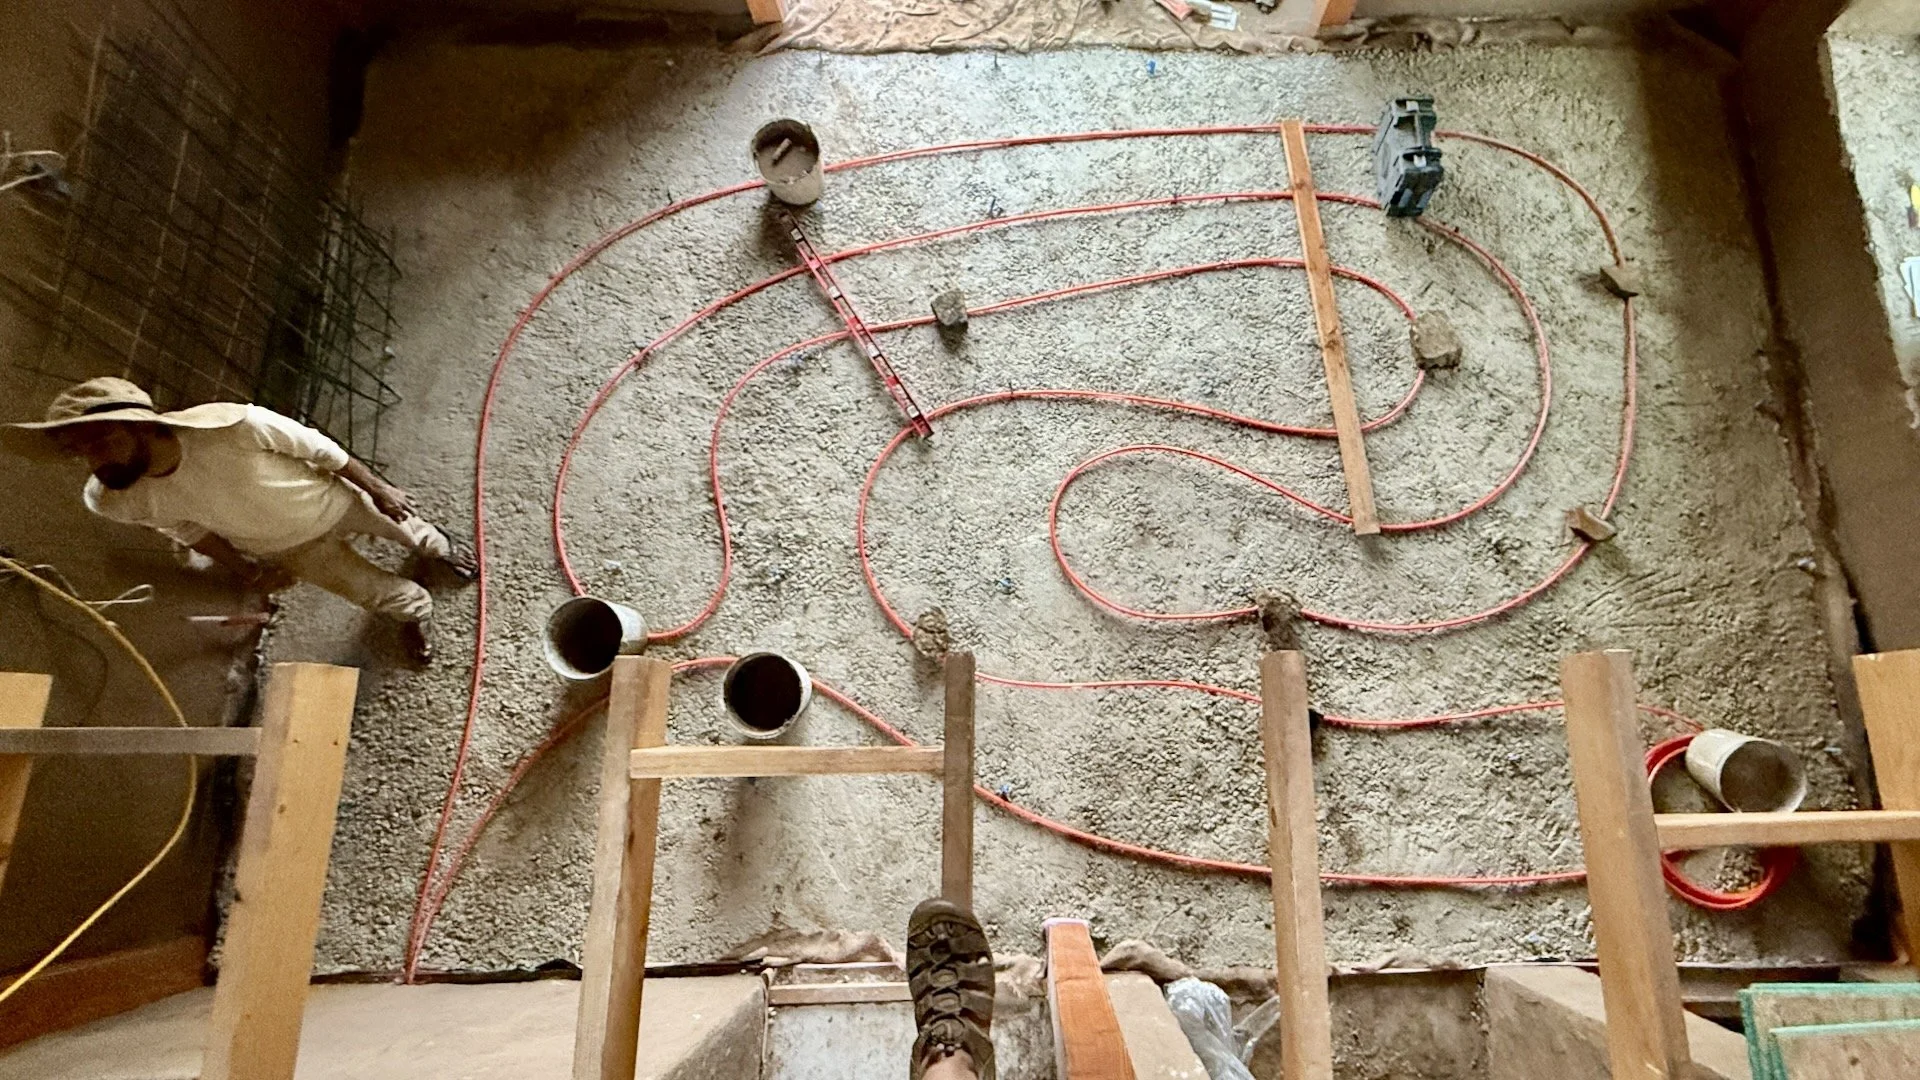
PEX tubing running throughout the kitchen, atop the base layer of the limecrete floor
Level check
With the PEX tubing in place, we then lay the second layer of limecrete over the tubing, essentially creating a PEX sandwich.
The biggest challenge at this stage is that the top of the second layer needs to be as perfectly level as possible. To this end, we used a combination of high-tech and no-tech: a laser level shining on a bunch of bamboo sticks that we marked at the appropriate height and then used to check levels as we worked our way around.
The challenge is compounded because we’re using NHL 5, which is the most cementitious of the hydraulic lime grades, meaning it cures the strongest but also the fastest, so one needs to develop the skill to work both accurately and quickly so that you get it done before it dries.
It’s fun to watch the tubes disappear into the limecrete, and then when the second layer is done you’d never know they were there… that is, until you walk barefoot on the nice, warm floor in the winter.
Of course the rough finish you see here isn’t the final one, but it’s a good place to pause while the heavy limecrete sets and cures, during which time we mist it gingerly with water several times each day to keep it from drying completely, which helps it reach maximum strength.
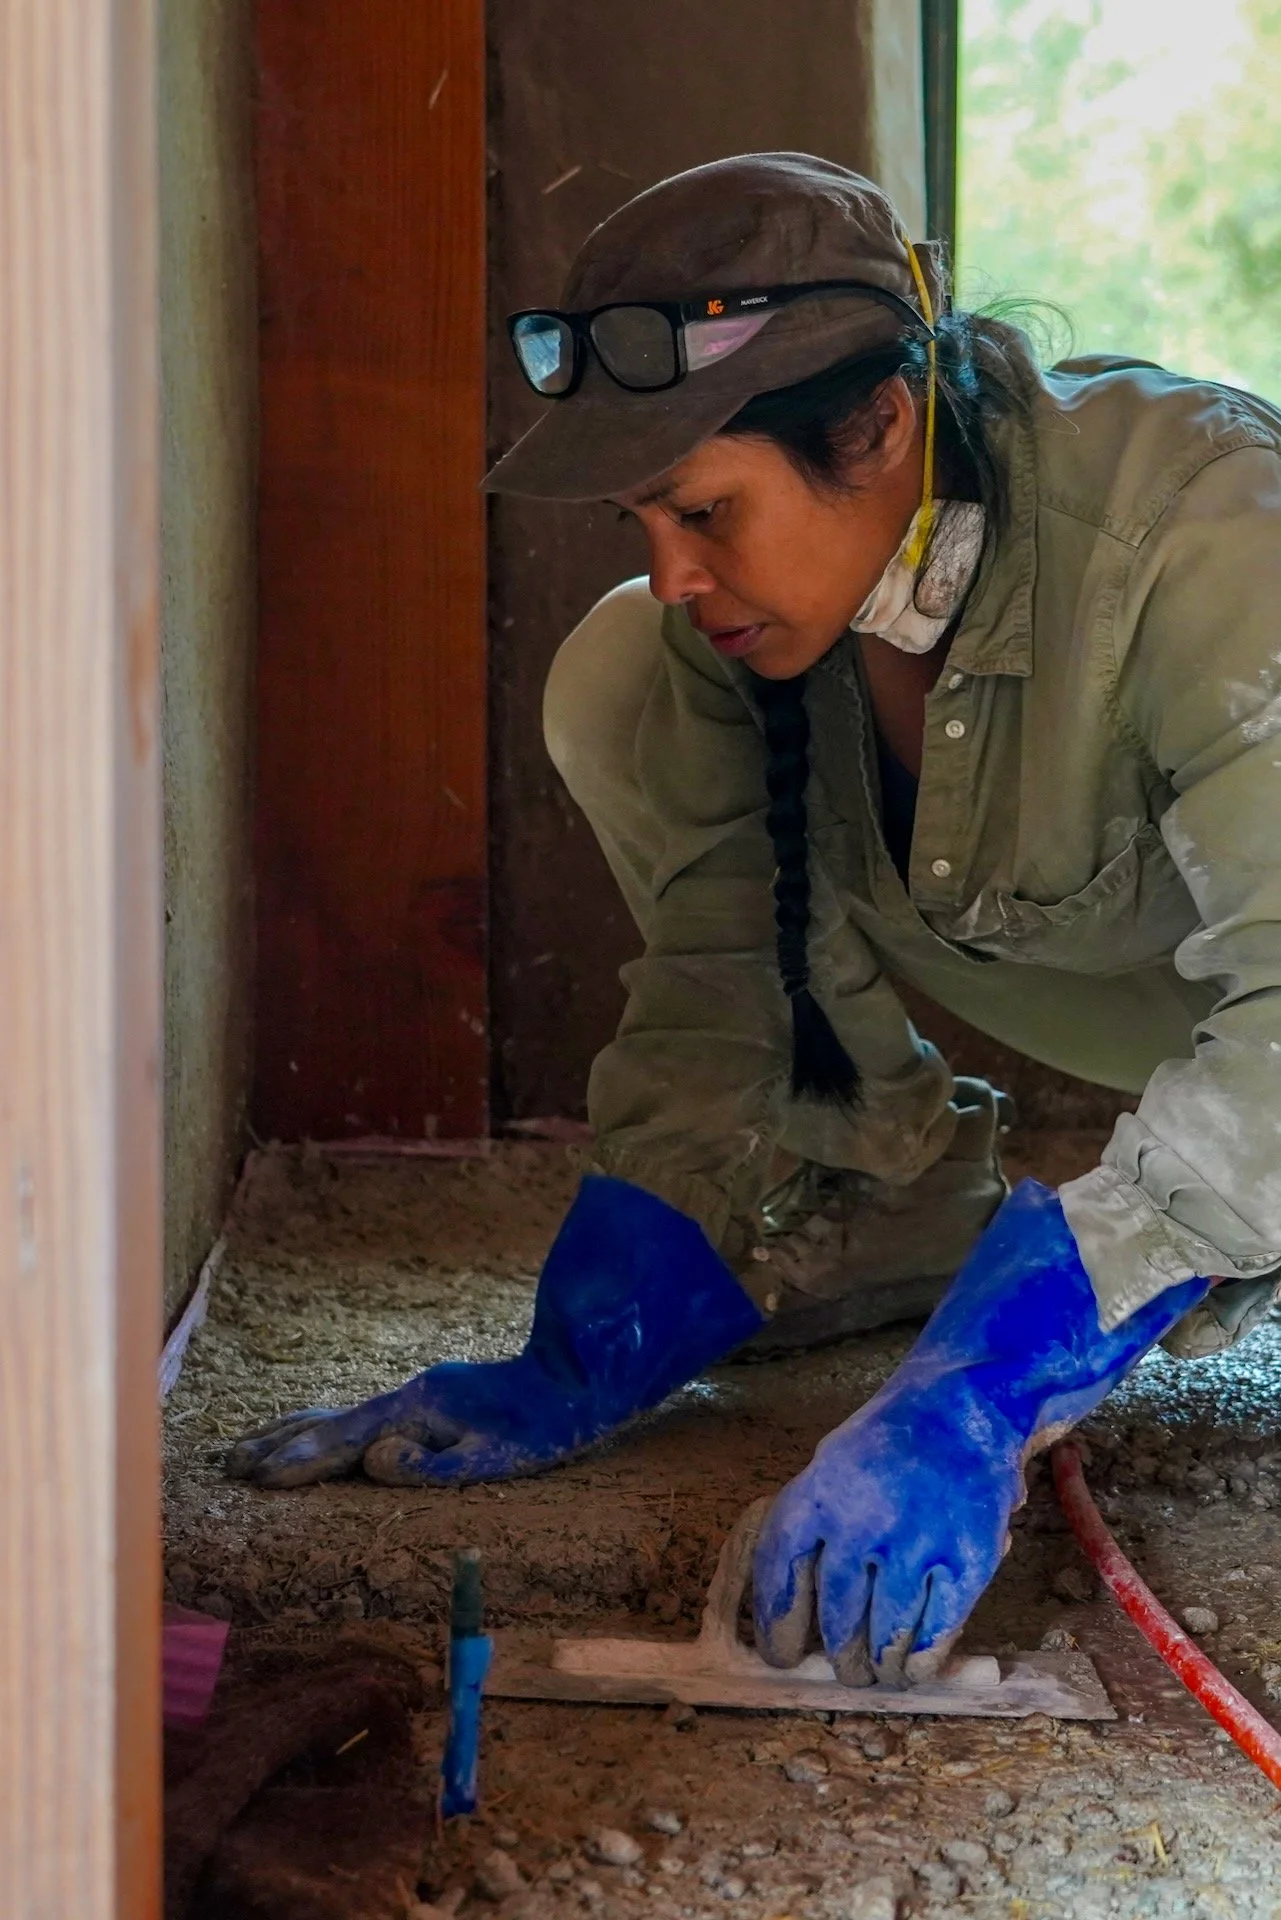
Daphne carefully checks the height of the top of the second limecrete layer
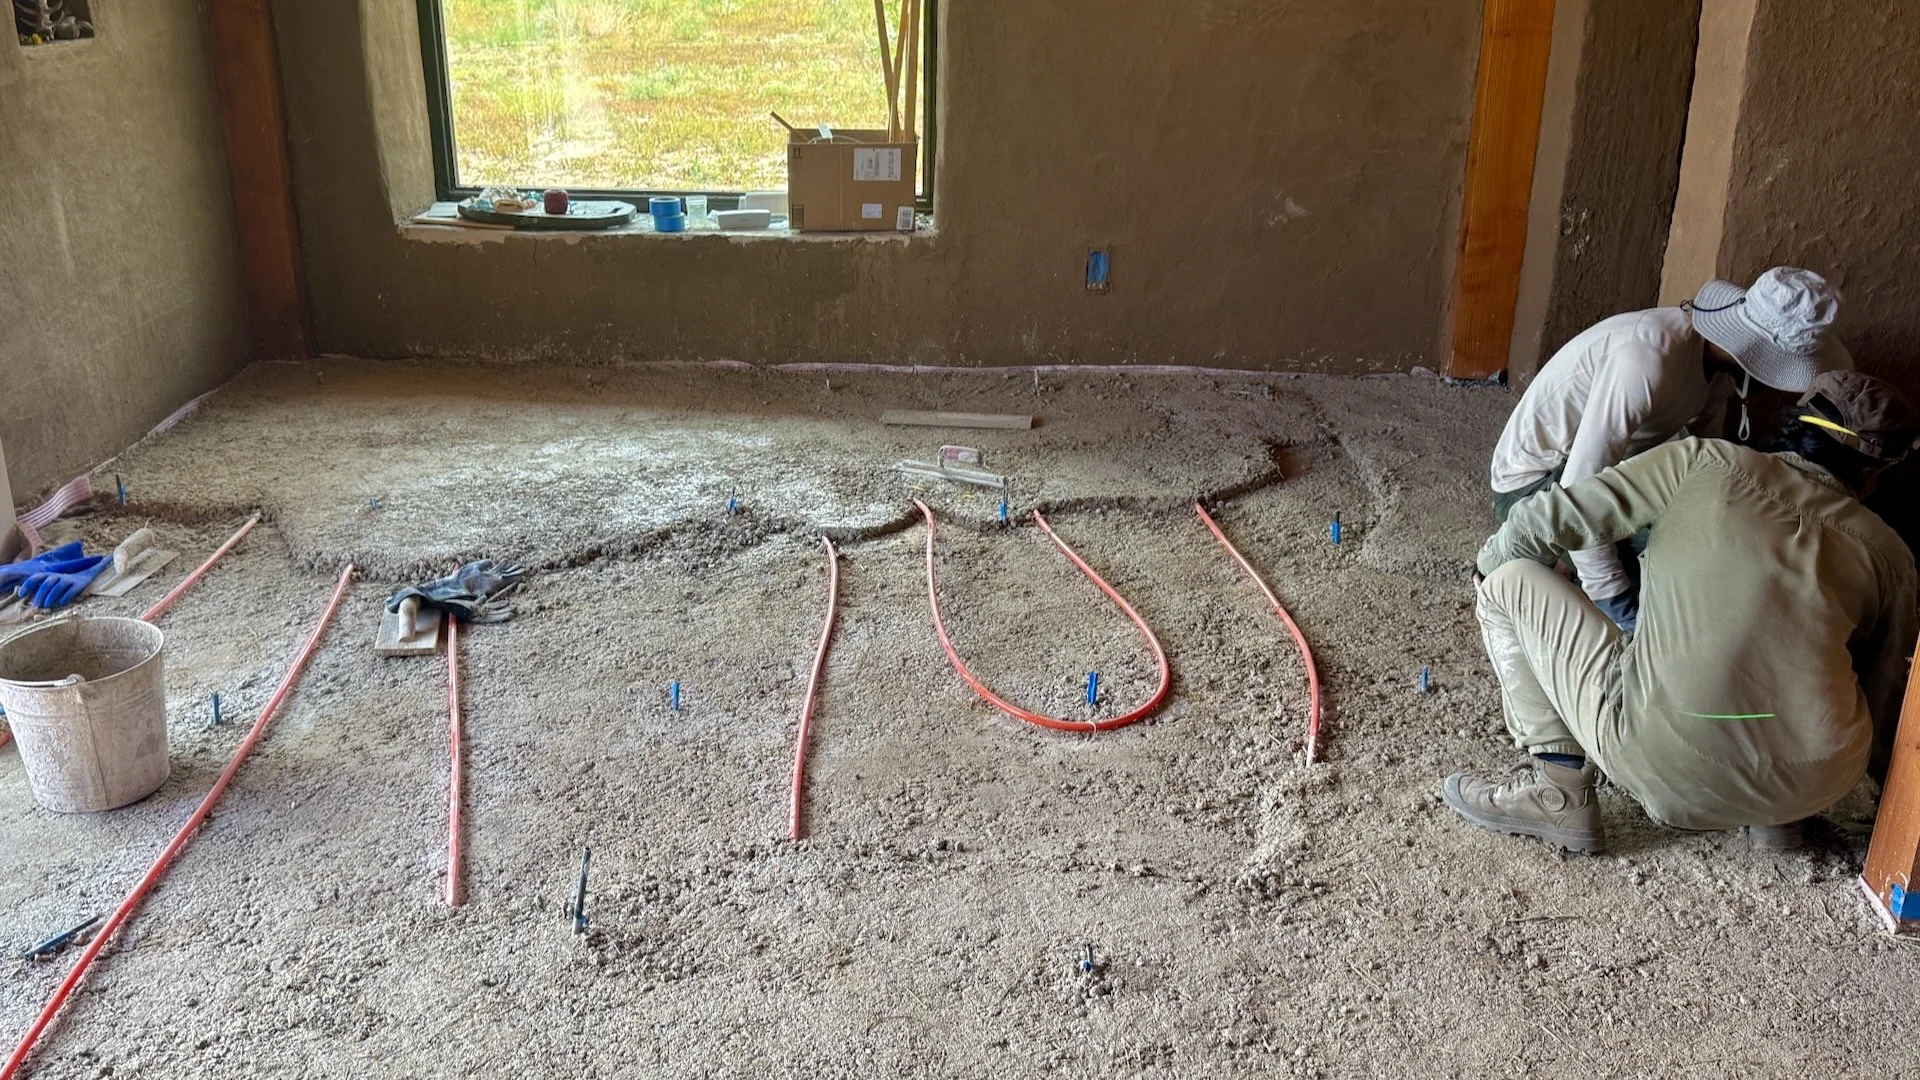
Radiant heating PEX tubes half-covered with limecrete
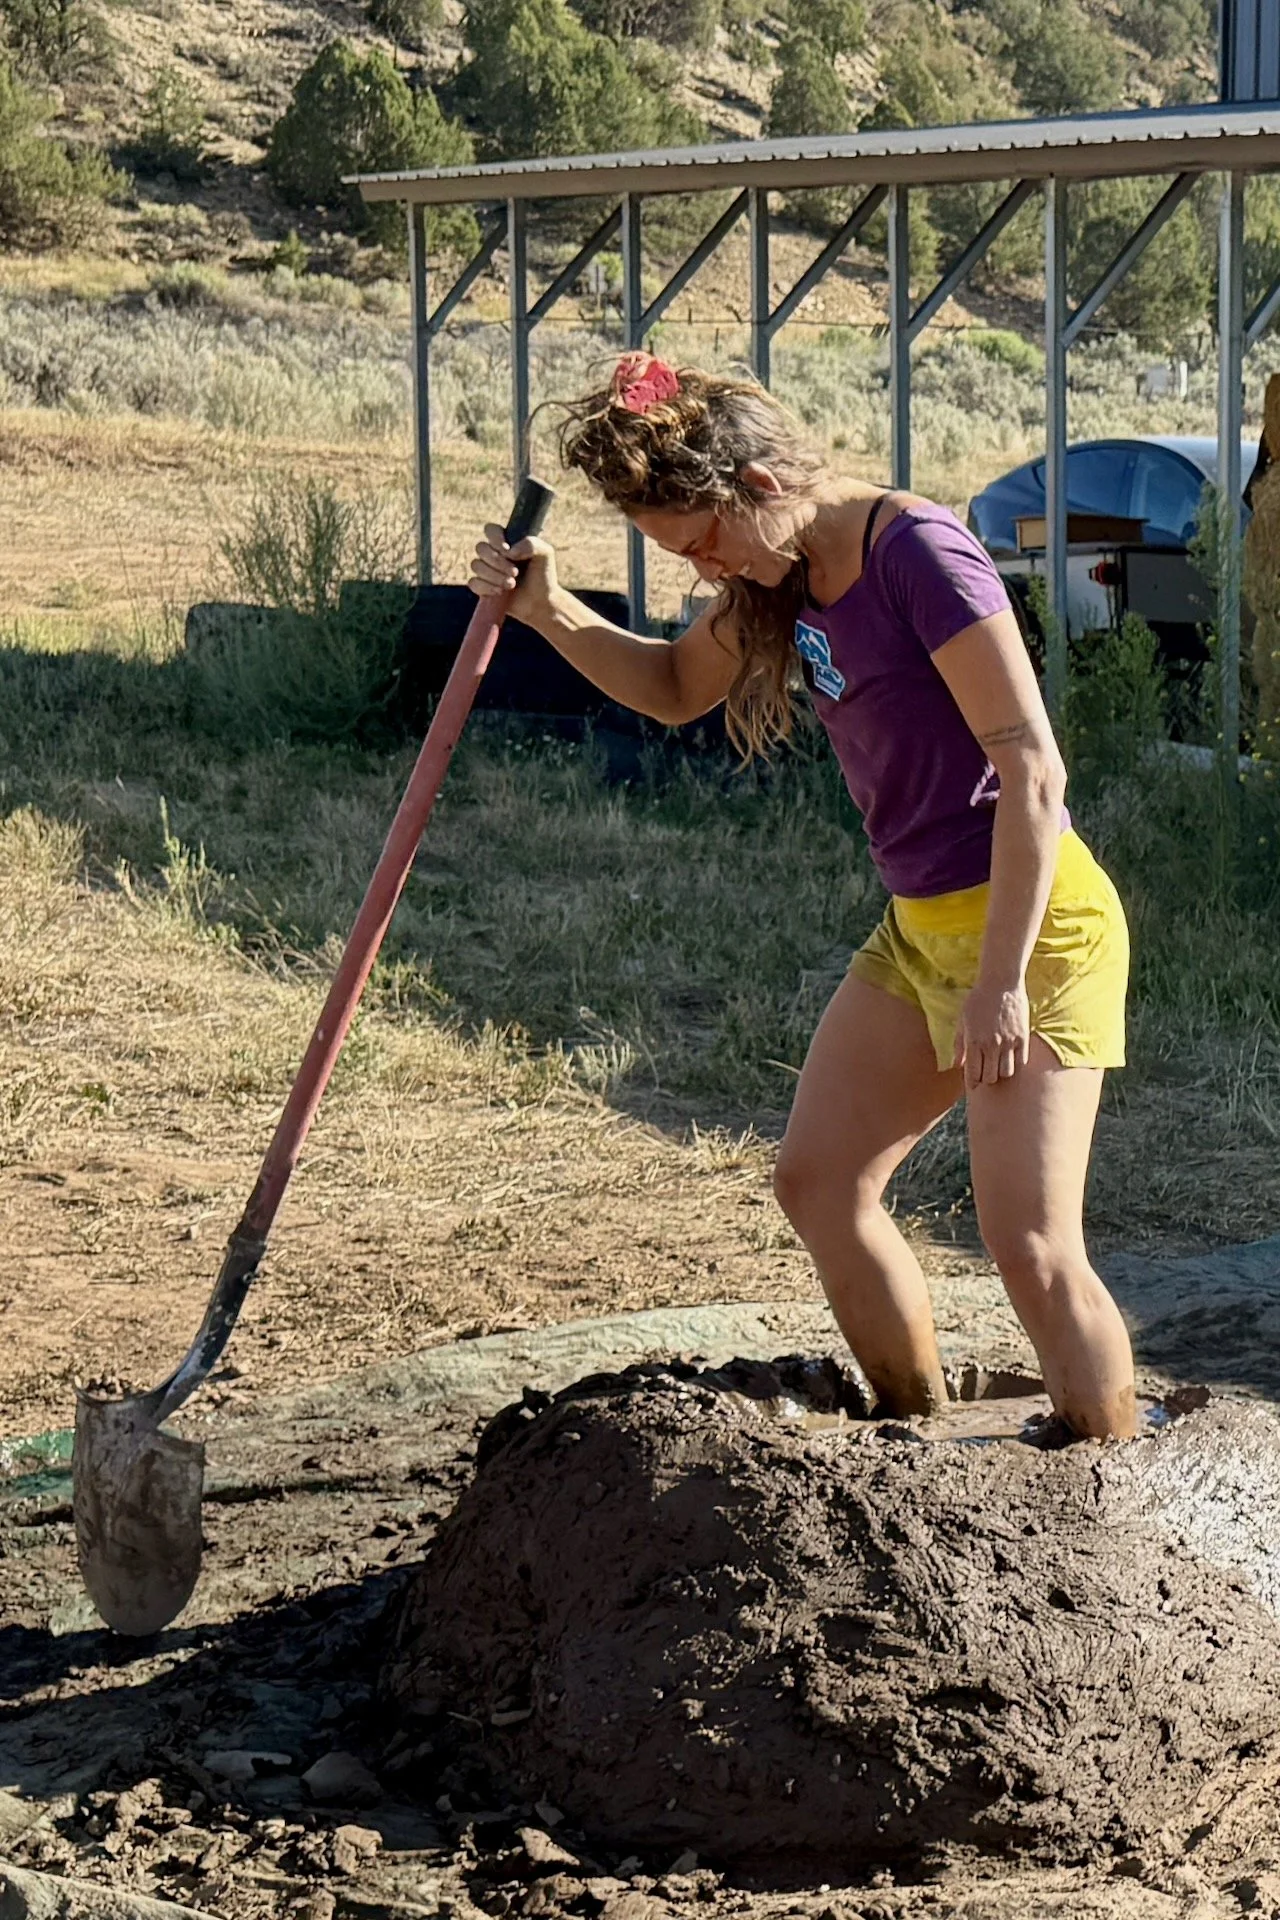
Leslie enters the “mud spa” to put her feet to good use
Precious building materials, right under our toes
With Earthville Institute’s campus still in the early stages of development, there’s plenty yet to be built, and as much as possible we build using the soil right under our feet.
With most earthen building projects done in the traditional way, the first step is harvesting some soil and dancing in it to mix it thoroughly with the feet (which is called “pugging,” which comes from the Sanskrit word for feet). The first step into a nice pile of mud is a moment for guaranteed smiles.
After pugging the piles every morning for five days, the mud is homogenous enough to be used for high-quality adobe bricks, which we leave drying in the sun for a week or two (depending on weather).
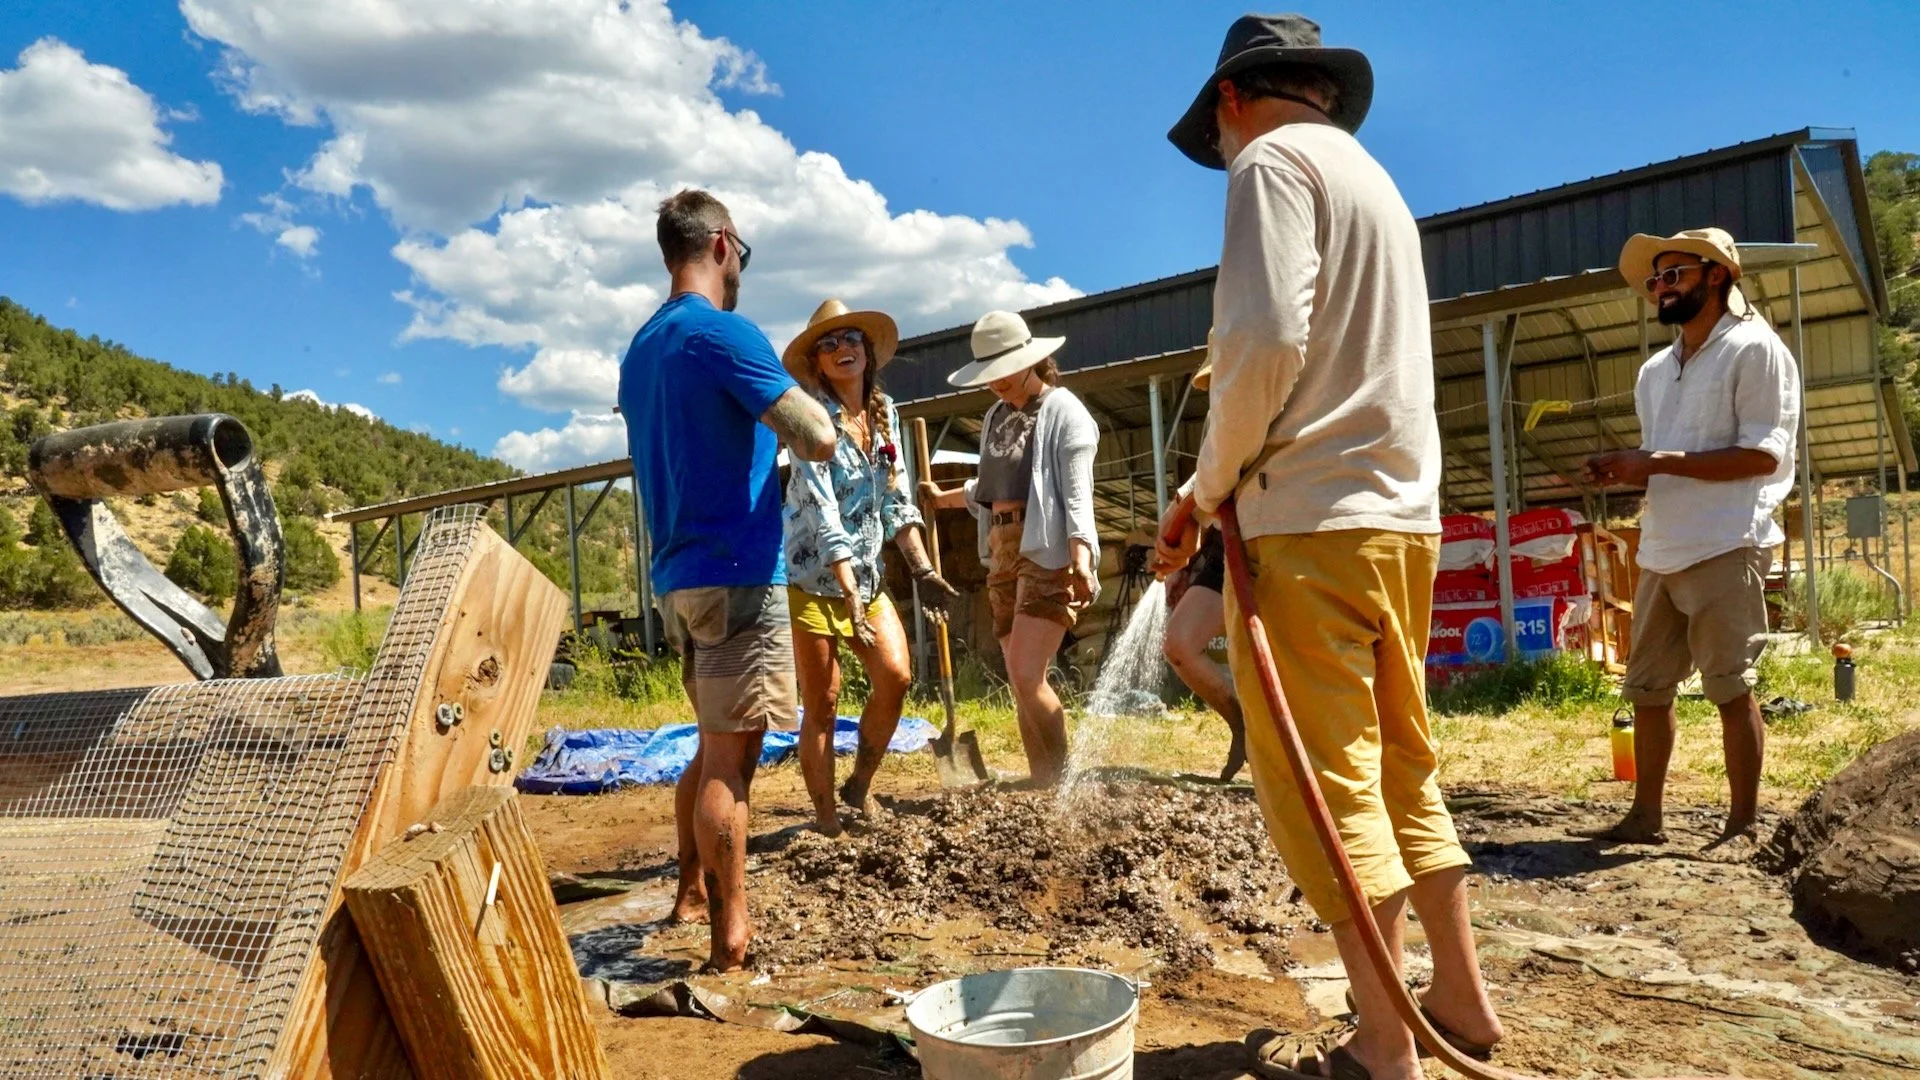
Room enough for everyone!
Adobe for abodes
Once the mud has enjoyed five days of pugging and five nights of soaking, it’s ready to be placed in wooden molds, which are then removed to leave the adobe bricks drying in place. (See our adobe how-to for details.)
One tradition we picked up in the Himalayas is that, after making each brick, the brickmaker signs the brick by using their fingers to make a simple design, called a “frog” (as you see Leslie doing in this photo).
When the sun is strong (as it usually is here in southwest Colorado), the bricks dry in 7-10 days, but we usually leave them out in the sun for two weeks just for good measure.
Once we have stored up a few thousand of these, we can raise a wall quite quickly.
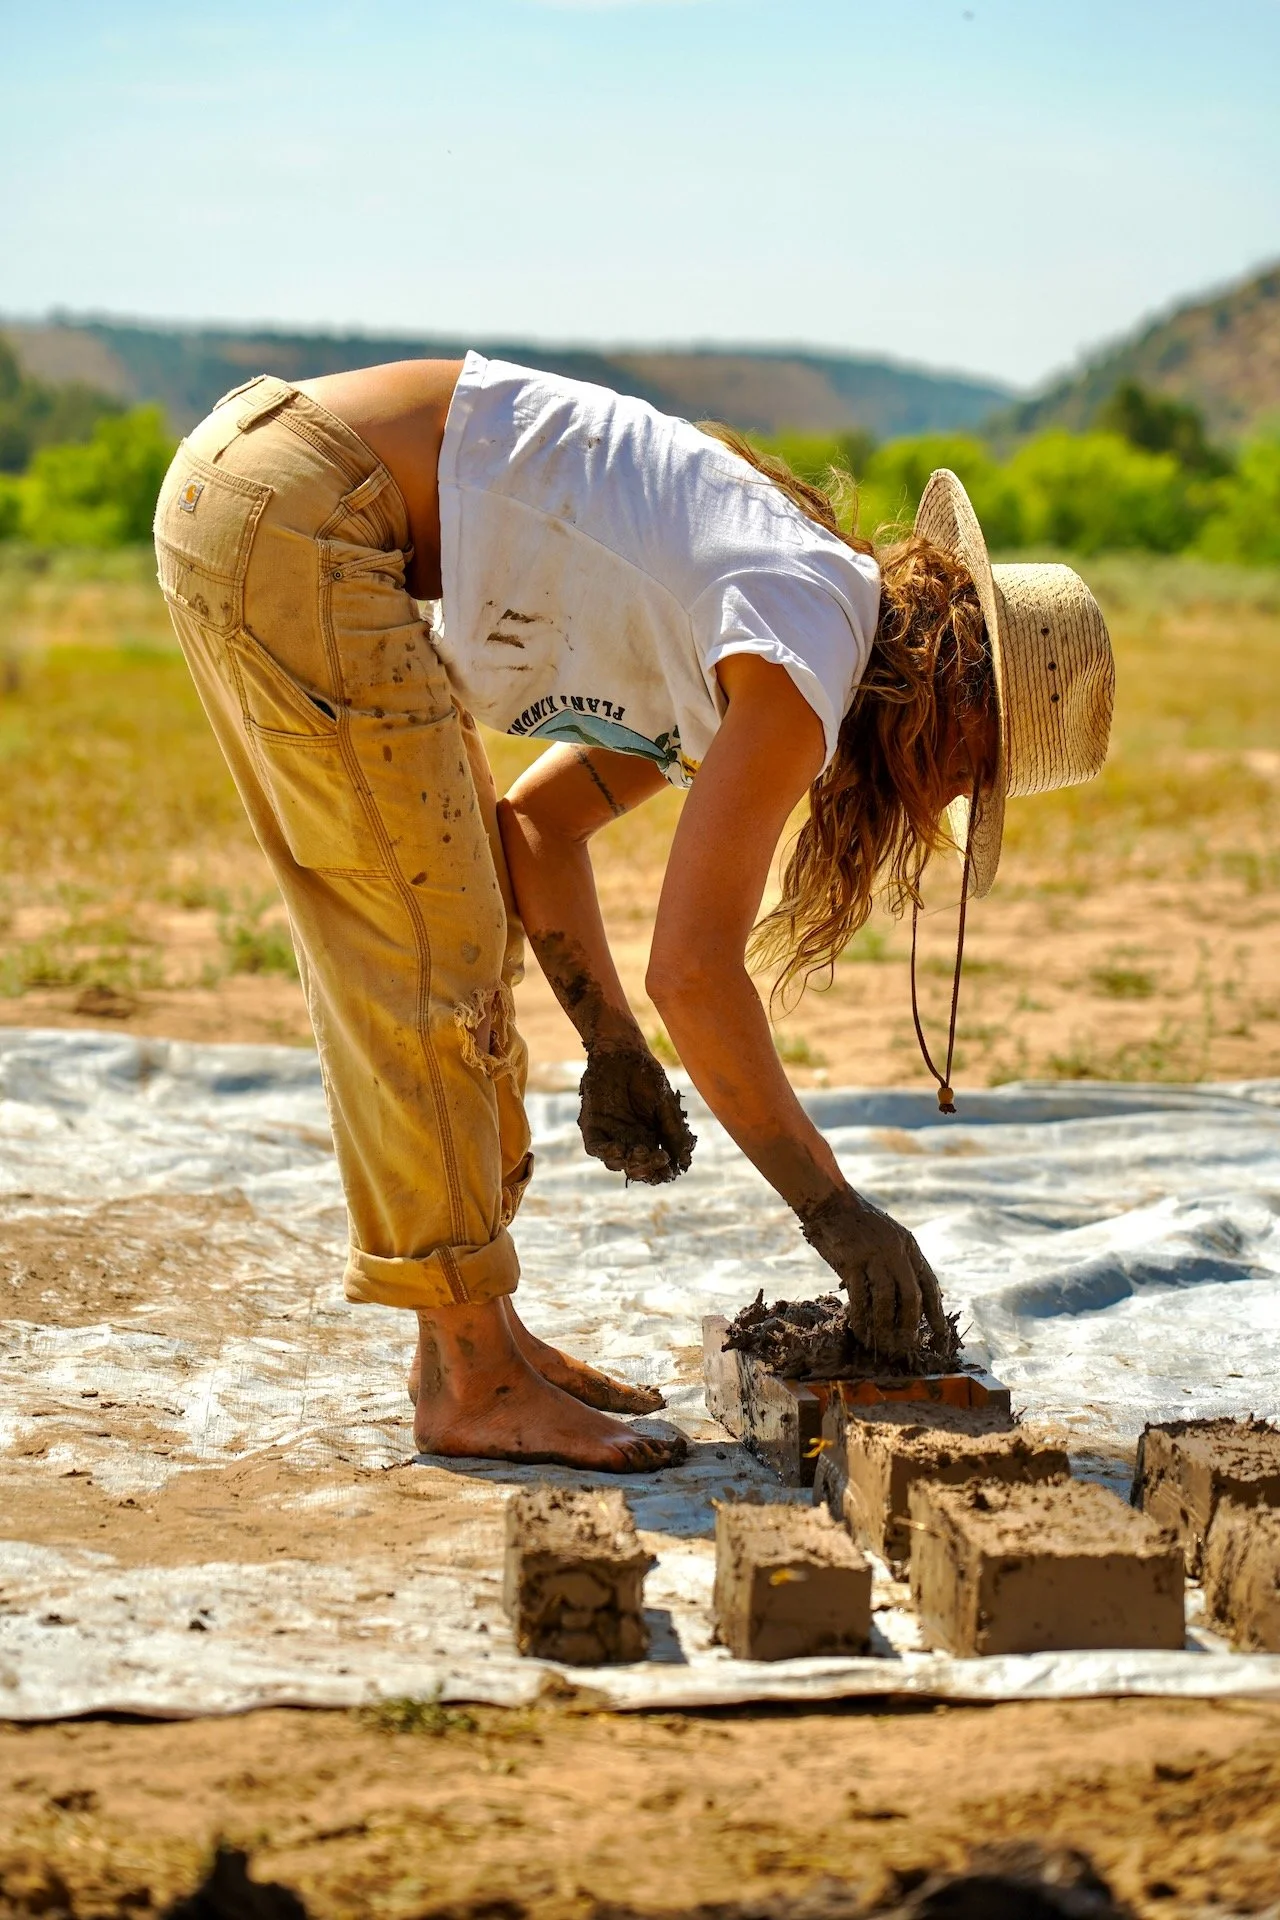
Leslie signs her “frog” pattern in a freshly made brick
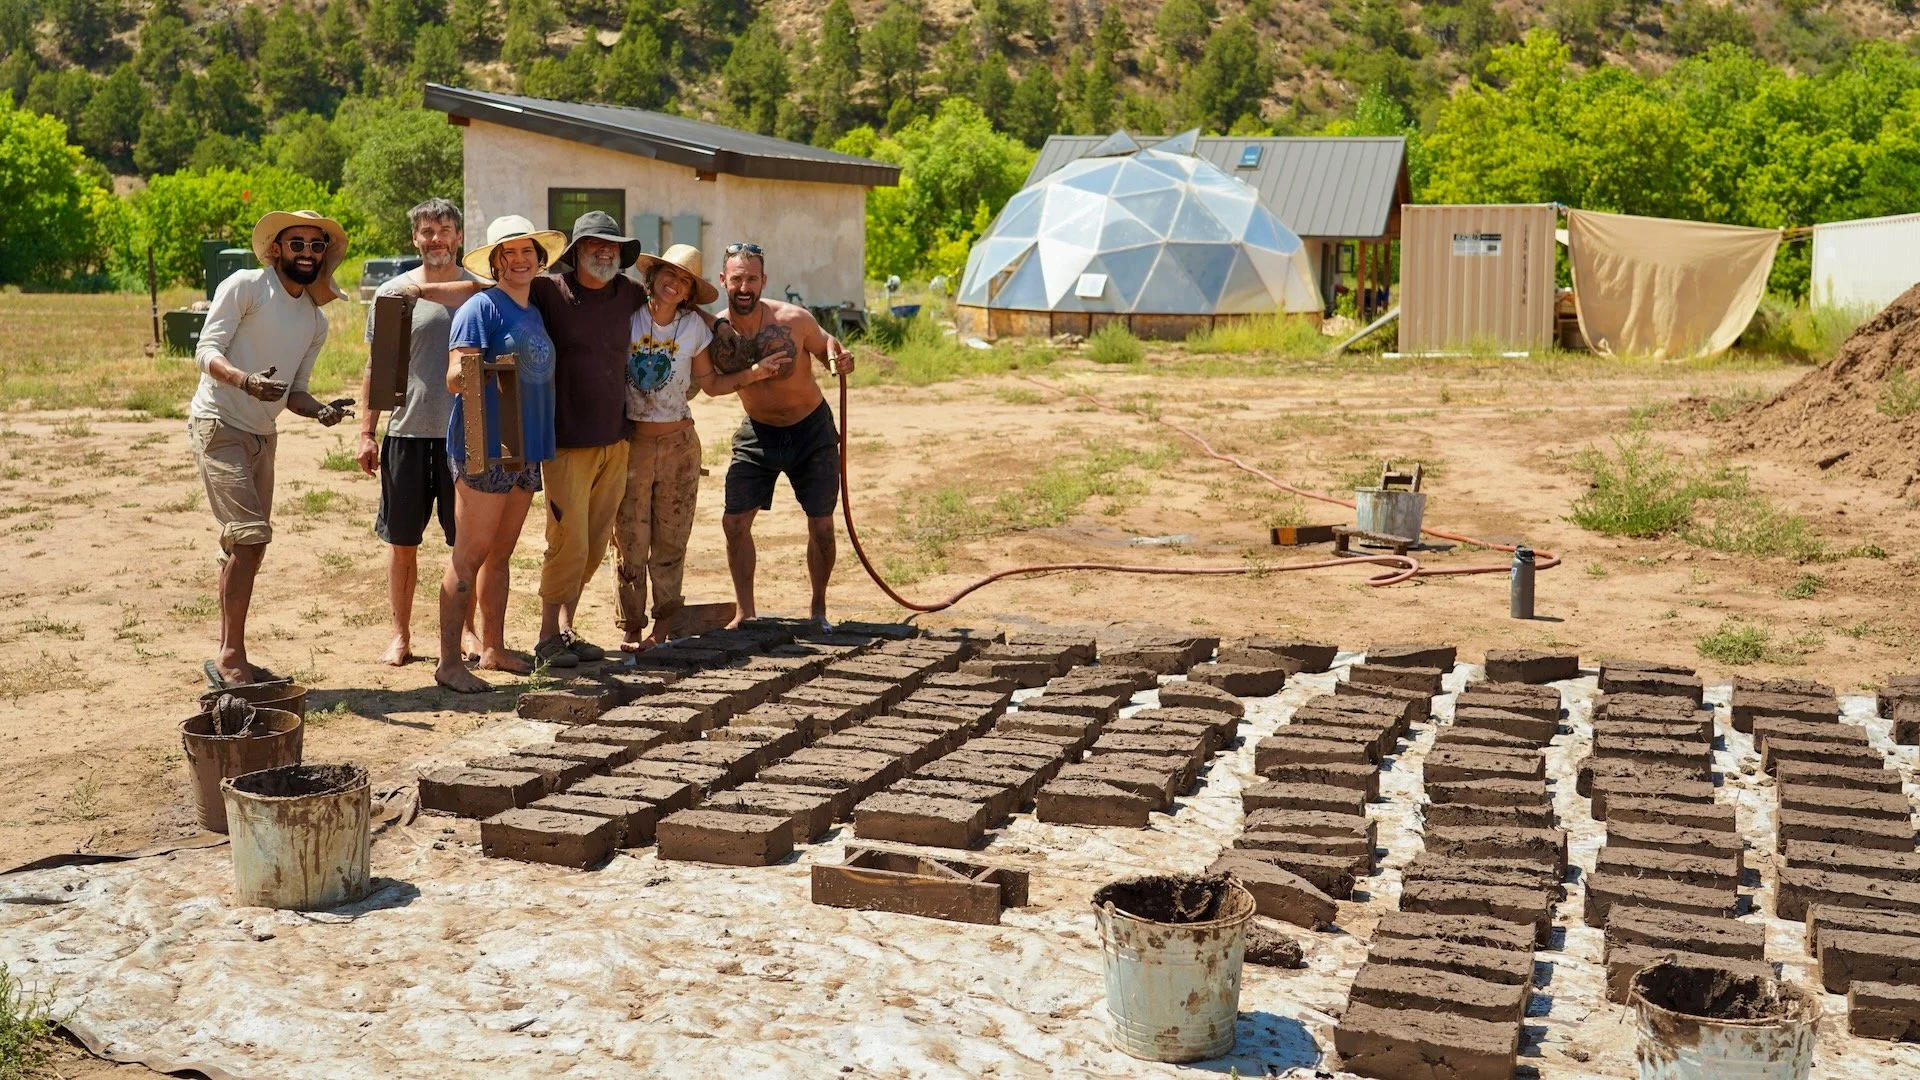
The happy bakers with their mudpies
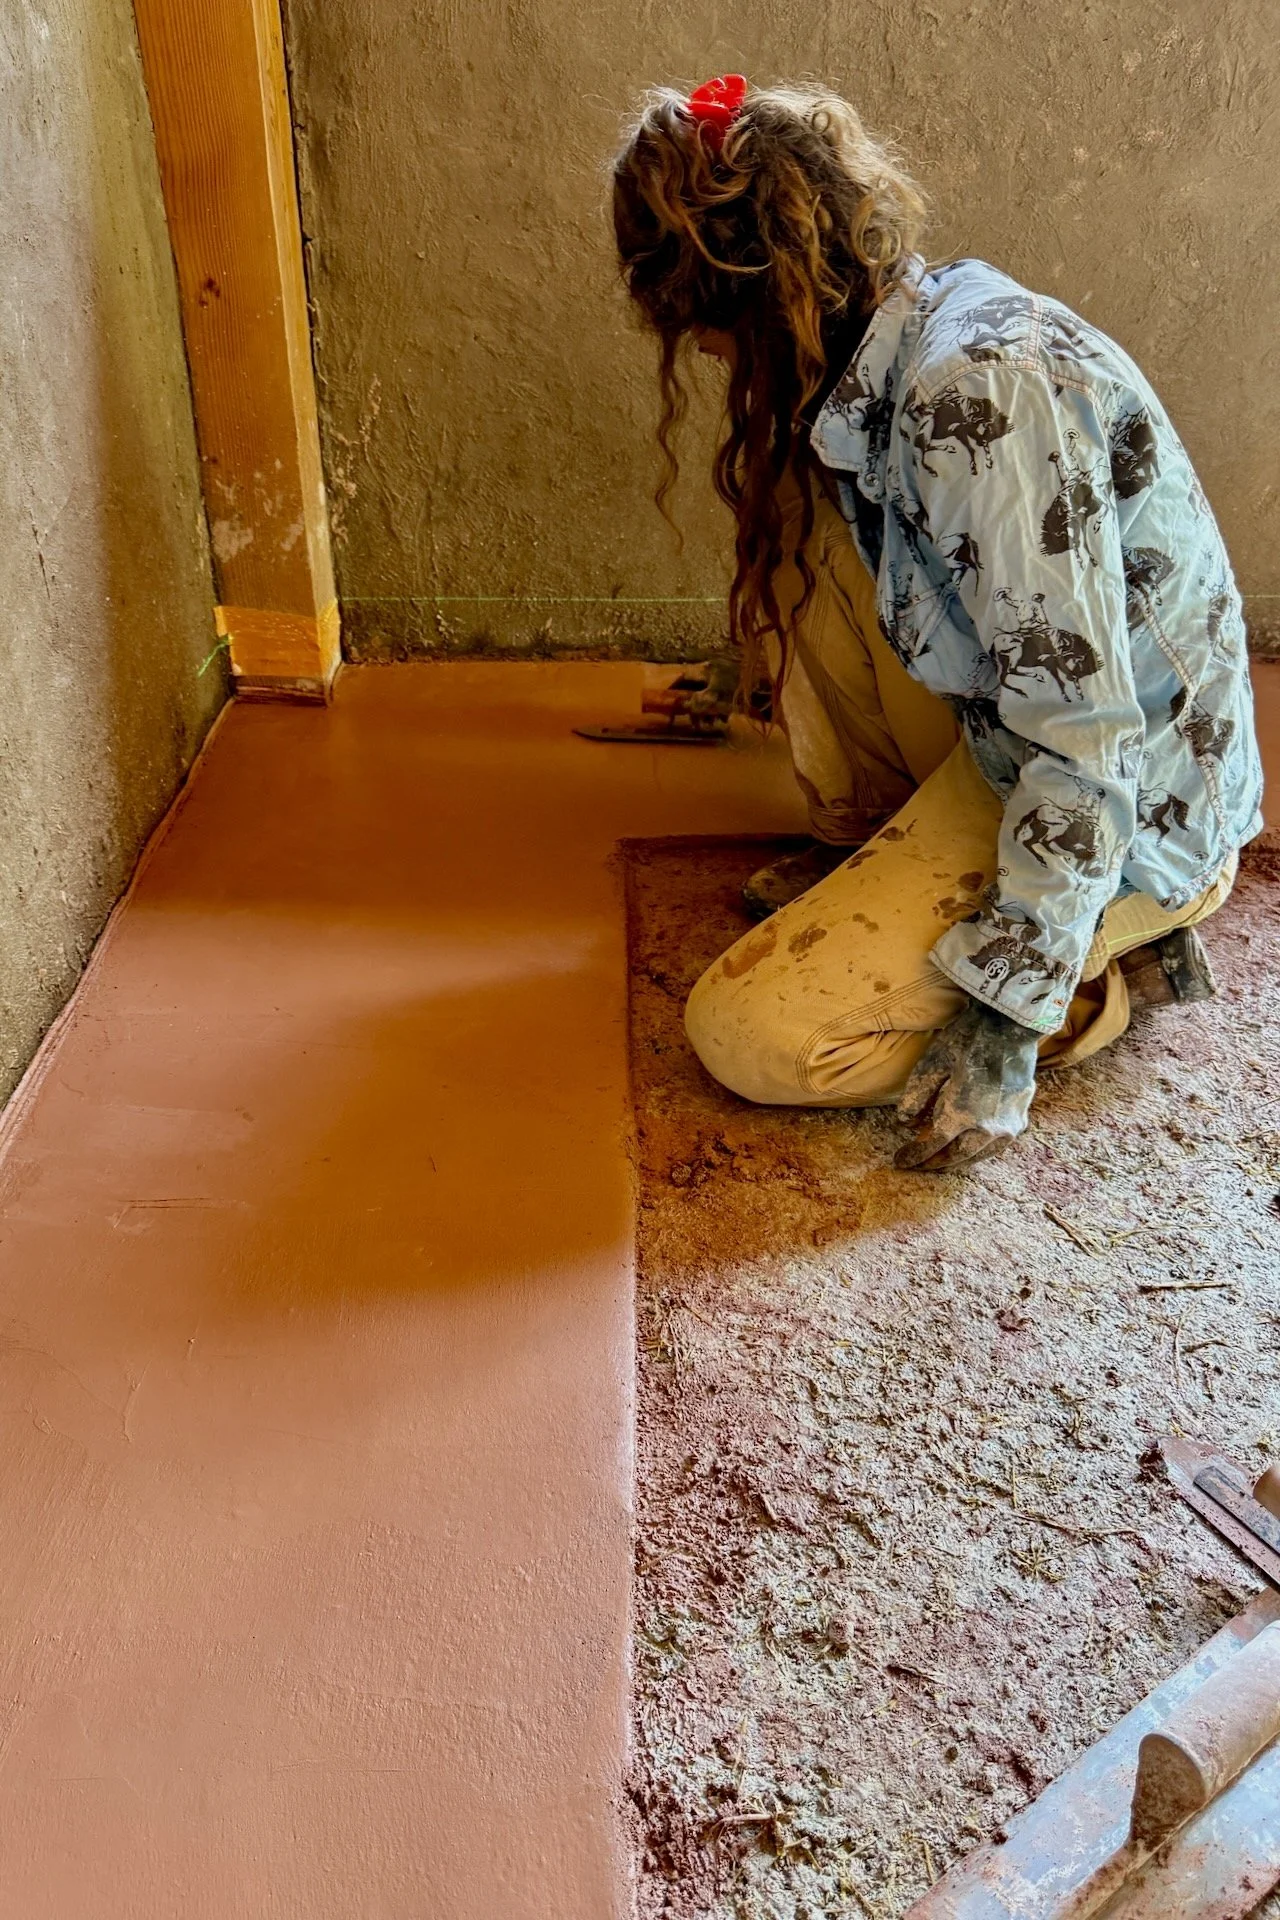
Leslie doing very fine work on our naturally pigmented limecrete
Back to the kitchen floor
Having left the adobe bricks to dry happily in the sun, we returned to our work on the limecrete floor in the kitchen. By this time, the second layer of limecrete had set nicely, more than strong enough to walk on and work on, allowing us to continue.
The final layer of the limecrete floor is much finer than the previous ones. Whereas the base and second layers contained gravel (for compressive strength) and straw (for tensile strength), the top layer wants to be very smooth, so we made this mix with just lime (NHL 5), sand, and water.
To this mix, we also added some natural pigment to give it a lovely, warm tone.
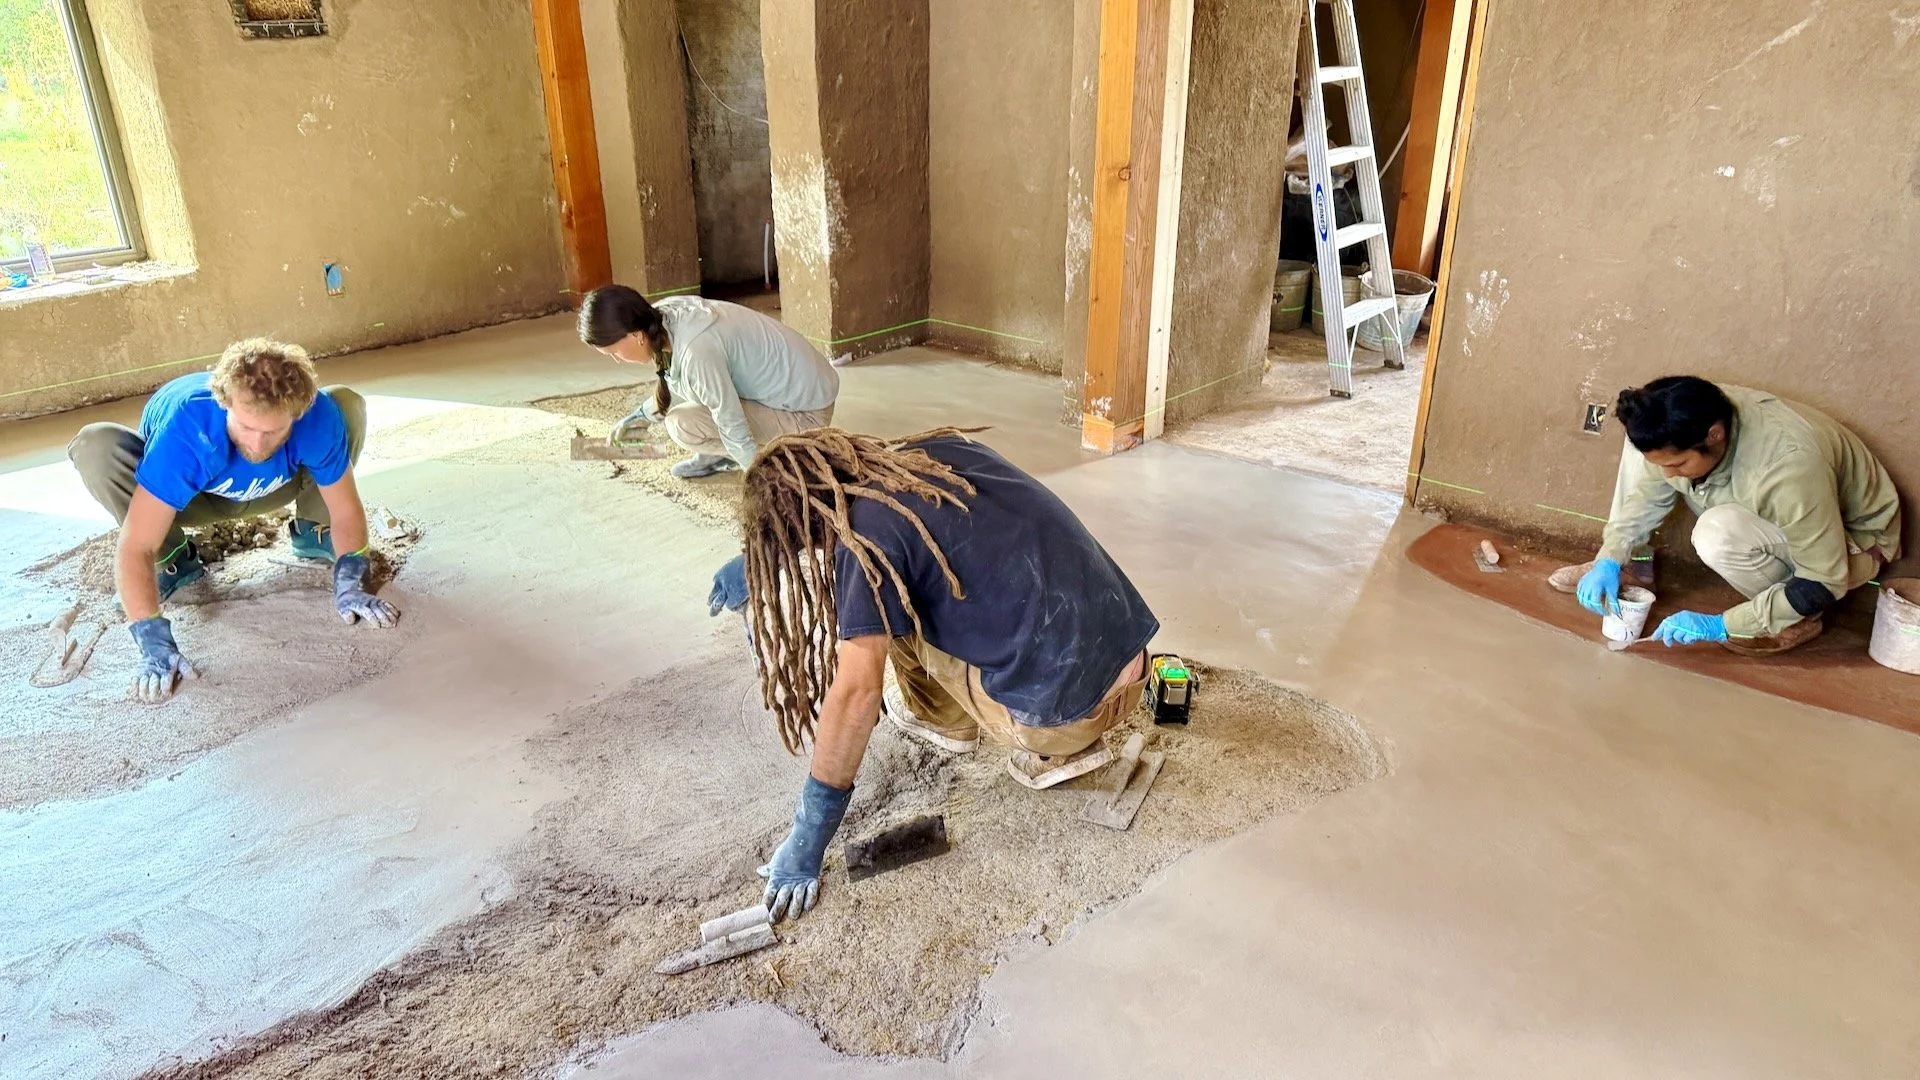
Chase, Anya, and Bear applying the final layer to the limecrete floor while Daphne does fine finishing work
Wonder cure
After putting the final touches on the top layer of the limecrete floor, we need to let it cure for a few weeks, ideally without any disturbance (e.g. puppies excited to get pawprints in it).
One limecrete begins to cure, the goal is to help it cure as slowly as possible. If it dries too quickly it won’t cure at full strength, so we keep it moist by misting it with water a few times a day for the first two or three weeks, and we hang tarps over the windows to keep the sun off of it.
Later, we’ll come back with a special grinder to smooth the surface and then we’ll add some natural color and sealant.
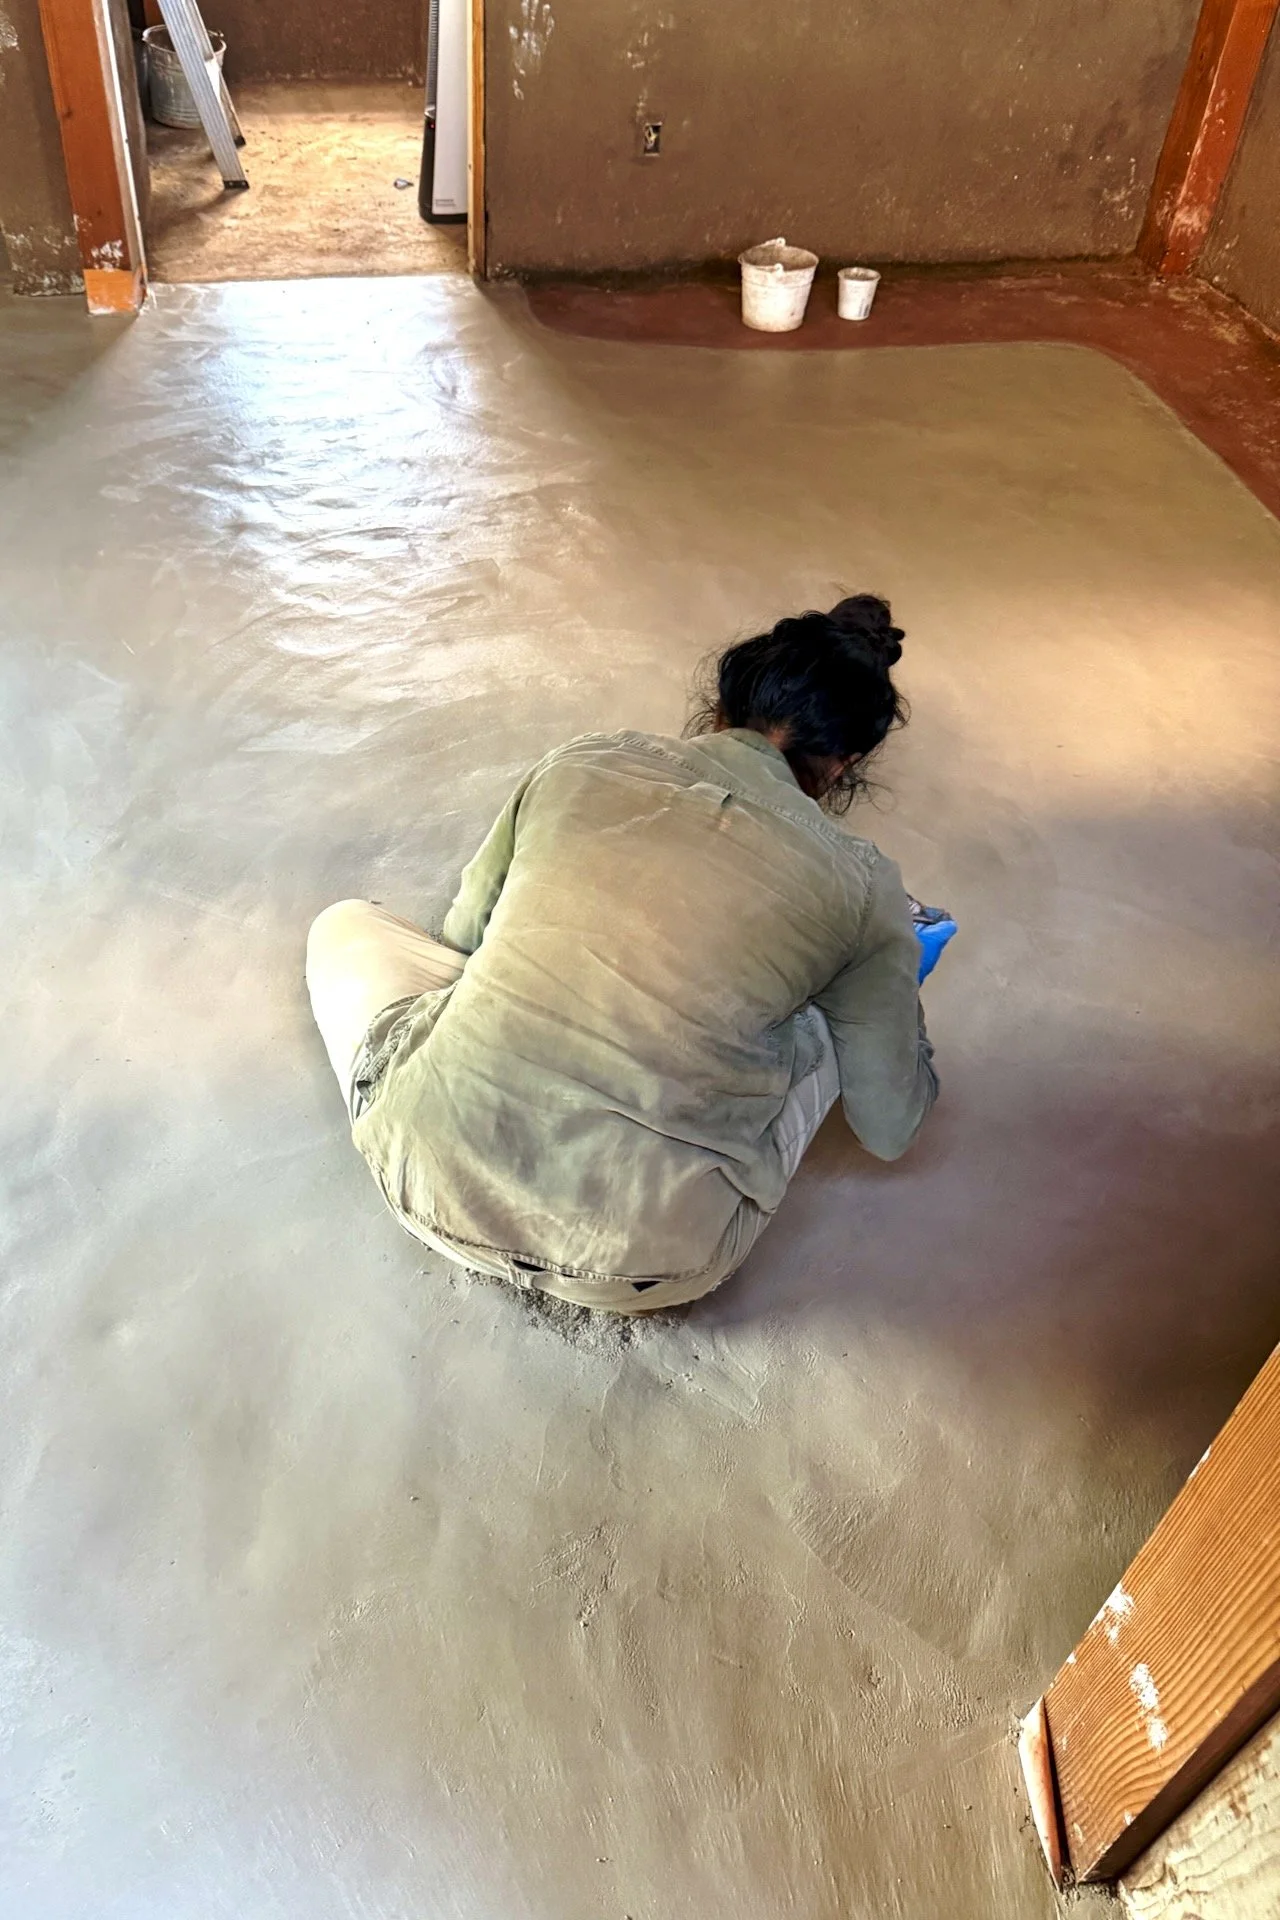
Daphne gives the final touches
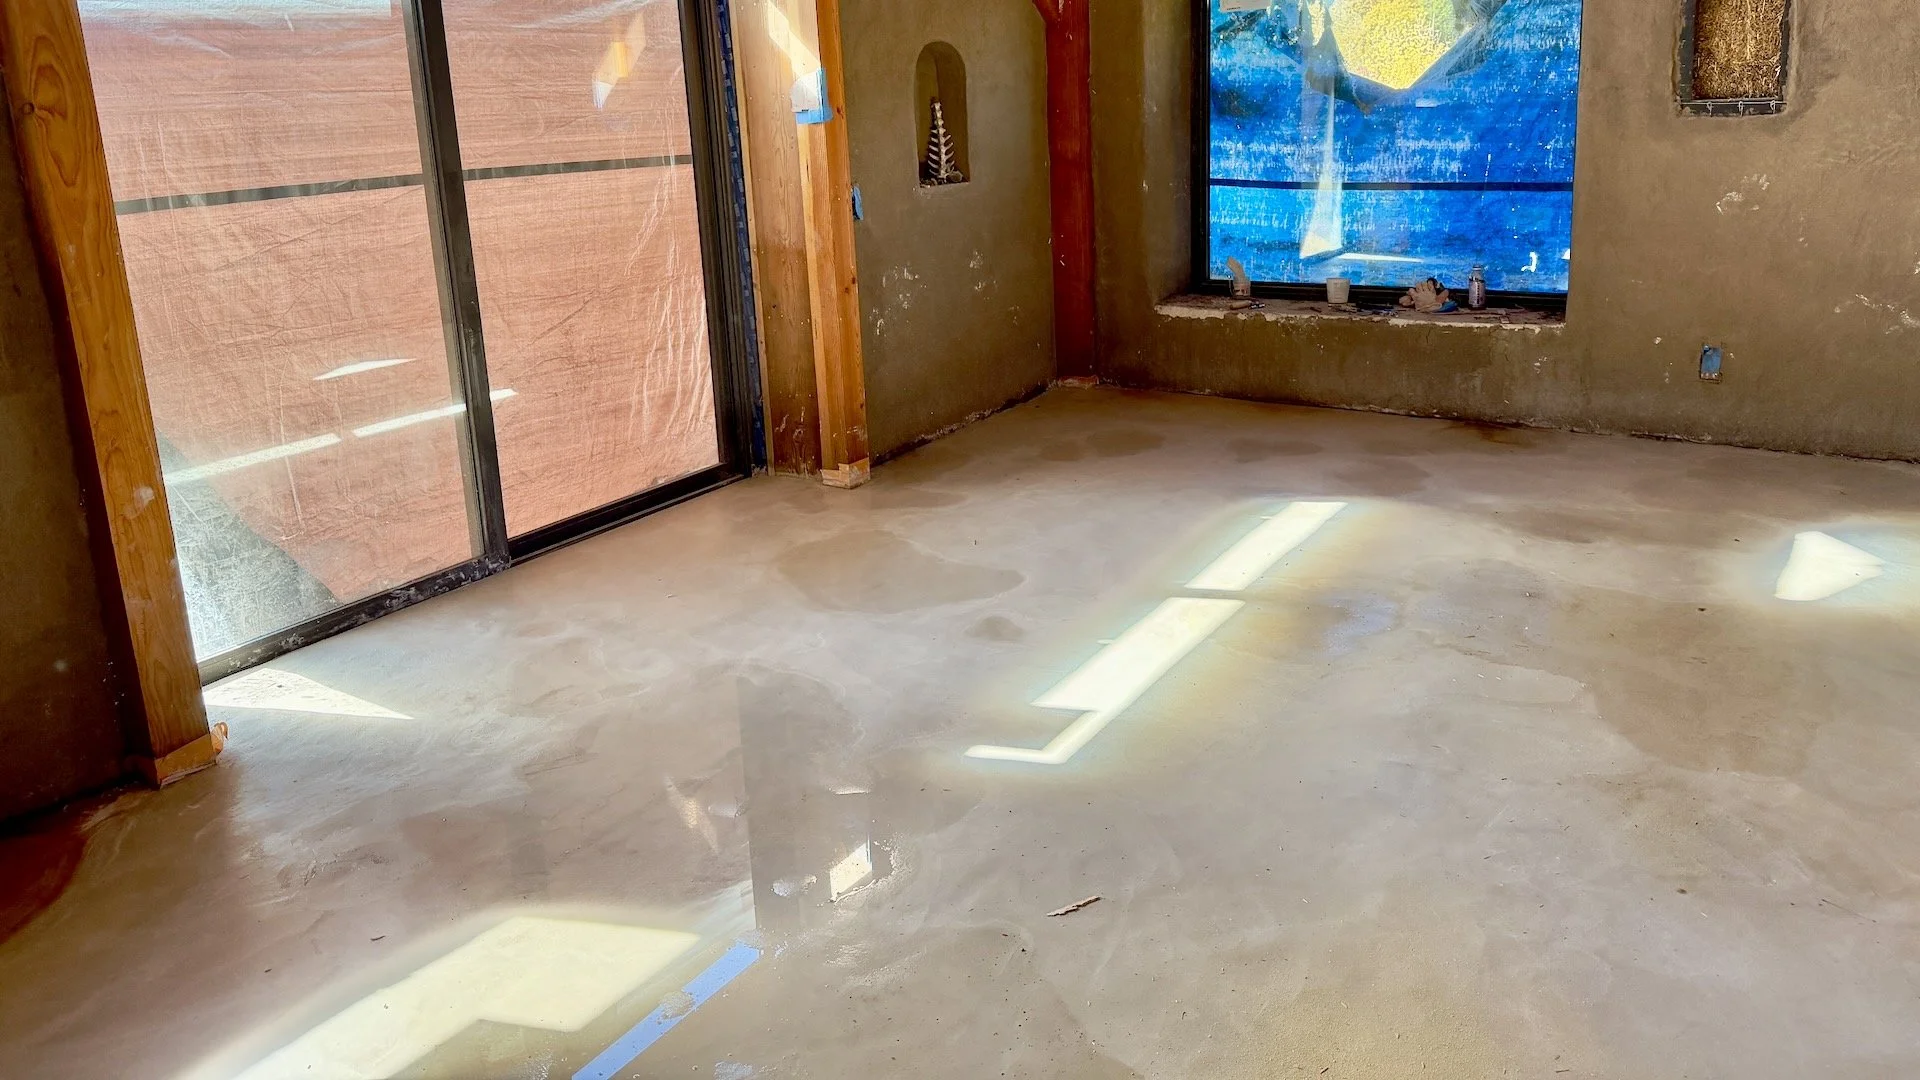
Limecrete floor, kept moist for the curing period
Reflections
We’re immensely grateful to be here to steward this beautiful land and build gently with natural materials, especially when we have such good-hearted people with us to learn by lending a hand. Our gratitude to everyone who joined in!
We looking forward to meeting new friends (and some old ones, too) at next year’s Sustainable Thriving intensive in 2026!
Meanwhile, here’s a short video with some reflections on 2025’s summer adventures. Enjoy!
Reflections on Summer of Sustainability 2025 at Earthville Institute
Photo credits: Tom Skelton and Mark Moore, used by permission
Video by Studio Lungta